Construire un coin livre enchanteur
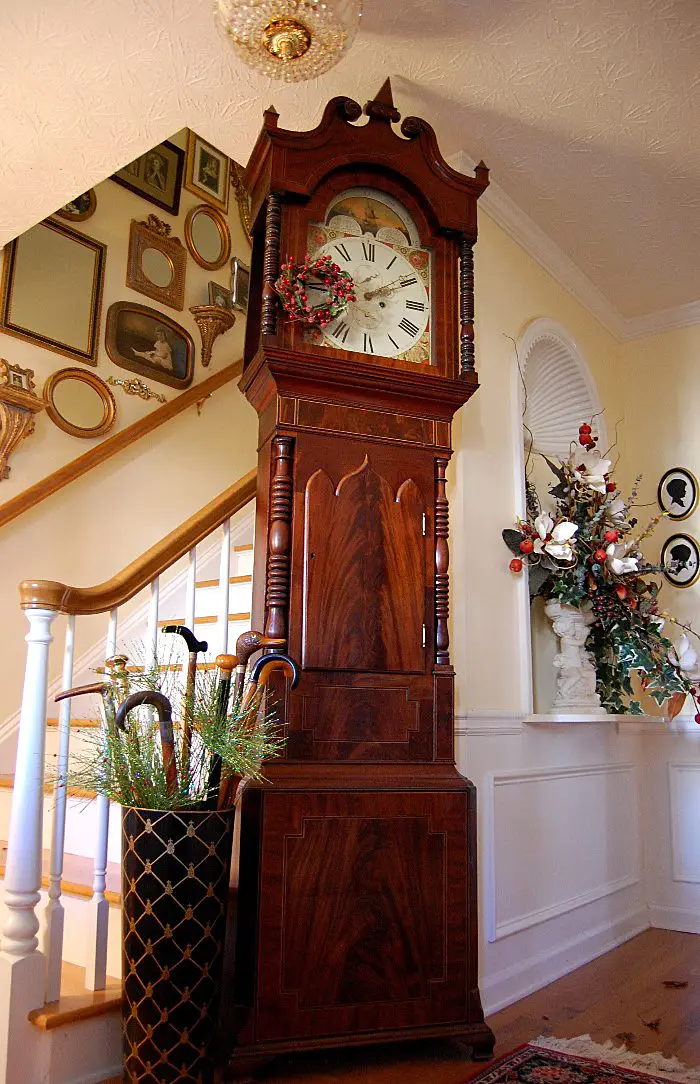
Bienvenue au 724ème lundi des Métamorphoses ! J'espère que vous avez passé un week-end fabuleux ! J'ai reçu des nouvelles un peu décevantes vendredi : l'entreprise de cloisons sèches qui était censée démarrer cette semaine le processus de pose de cloisons sèches dans la partie inachevée du sous-sol me retarde de quelques semaines. À la dernière minute, il s'est vu confier un énorme travail, un client qui lui faisait lisser tous les plafonds de toute sa maison. Ici où je vis, de nombreuses maisons plus anciennes ont des plafonds pointillés avec un motif floral. Vous pouvez voir ce que je veux dire sur cette photo prise dans mon entrée ci-dessous. Je n'ai jamais été fou de ce style de plafond, je préférerais moi-même de loin un plafond lisse.
Je ne peux pas reprocher à mon gars des cloisons sèches de ne pas avoir refusé un gros travail. . Je suppose que le client avait besoin de le faire immédiatement. Il voulait reporter au 27 mais cette date ne me convient pas, alors maintenant nous prévoyons début janvier.
Il pleut presque constamment ici depuis environ une semaine. Je suis tellement sous la pluie maintenant et j'adorerais quelques jours de soleil, mais les prévisions montrent que davantage de choses se dirigent vers nous plus tard dans la semaine. Avec toute cette pluie, c'est le moment idéal pour commencer mon petit coin-livre qui est arrivé hier.
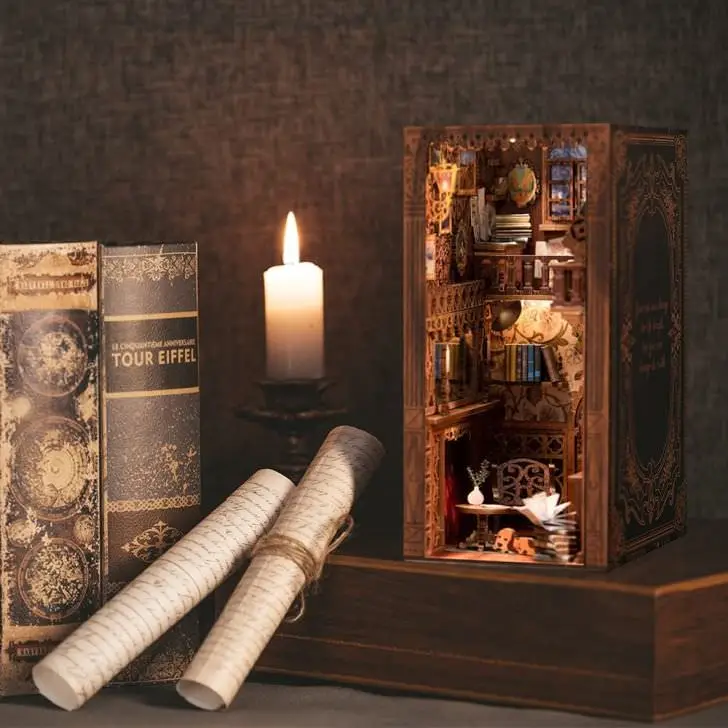
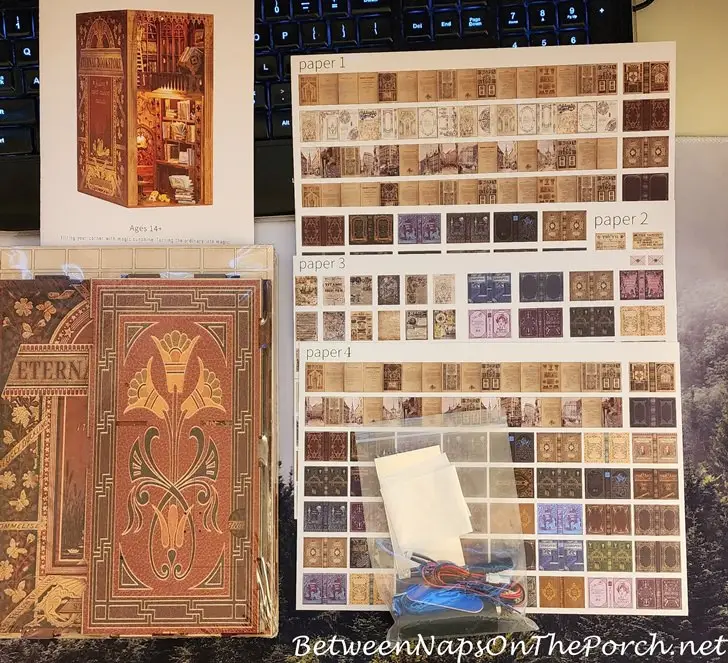
Vous vous souvenez peut-être que dans mon récent article de suggestion de cadeau, j'ai mentionné que j'avais J'ai commandé un de ces adorables kits de coin livre.
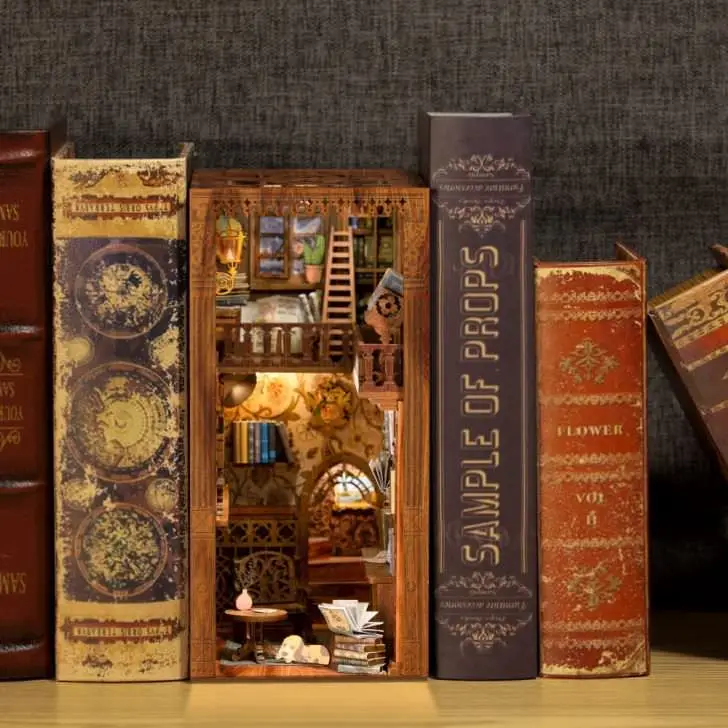
J'ai toujours admiré ces petits coins enchanteurs.des coins de lecture et j'adore leur aspect niché entre les livres sur une étagère. ♥ C'est celui que j'ai acheté et vous le trouverez (avec plusieurs autres modèles) ici : Coin de lecture pour étagère.
Lorsque mon kit est arrivé, voici ce que j'ai trouvé à l'intérieur : des instructions, des petites couvertures de livres à découper, le câblage électrique pour l'éclairage et les pièces de bois qui composent le petit coin.
J'ai eu un début difficile - une série folle de faux pas. Il m'a fallu un certain temps pour comprendre quelle pièce était mon mur de départ.
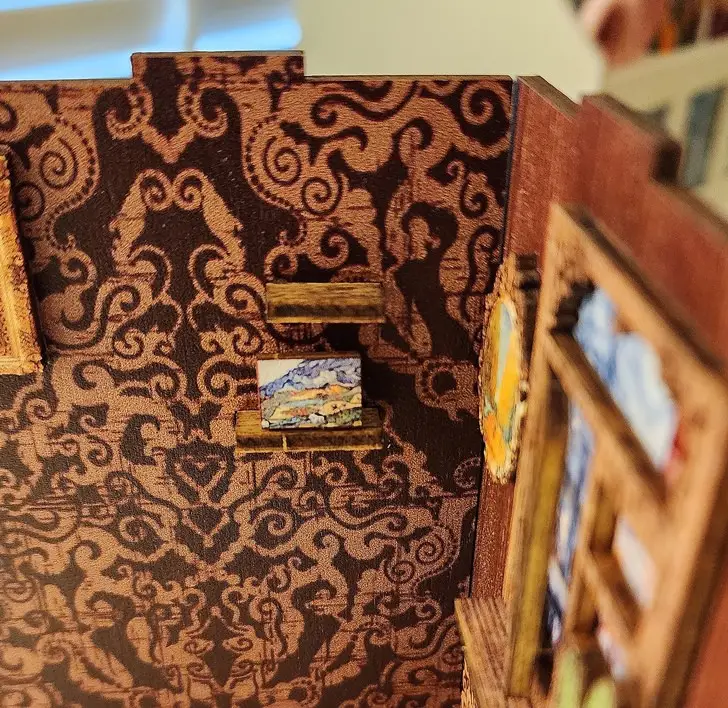
Ensuite, j'ai procédé au collage de ces deux minuscules étagères sur le mur, à l'envers - et je l'ai fait avec de la super glue donc il n'y avait pas de changement ! On pourrait penser que je l'aurais remarqué après la première étagère, mais non ! Je l'ai fait avec les deux étagères ! Arghhh !
Je suppose que j'étais fatiguée car il était assez tard quand j'ai commencé. Heureusement, j'avais des marqueurs à tache sous la main, alors j'ai juste teinté la surface supérieure des étagères et maintenant elles ont l'air bien.
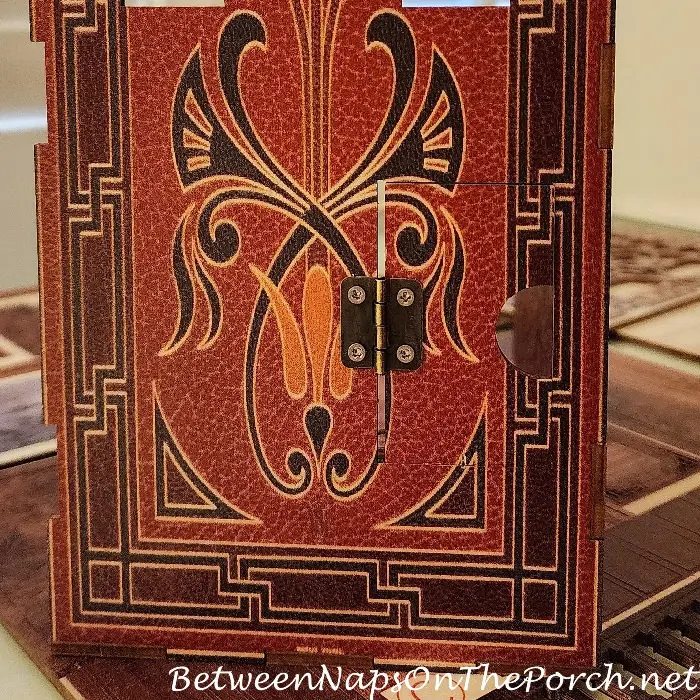
Juste au moment où je pensais vraiment comprendre, j'ai attrapé un petit sac qui contenait les plus petites vis que vous ayez jamais vues de votre vie - des vis qui sont nécessaires pour fixer une minuscule charnière sur une petite porte sur l'un des murs. J'avais oublié que je n'avais pas refermé le sac, alors les 4 minuscules vis se sont envolées. Il m'a fallu 15 minutes avec une lampe de poche pour les trouver toutes. Je suis étonnée de les avoir trouvéesaussi rapidement puisqu'ils ont à peu près la taille d'une miette. mdr Après cela, les choses ont commencé à se passer beaucoup plus facilement.
Avant de commencer, j'ai trouvé plusieurs vidéos sur YouTube montrant étape par étape comment construire ce coin lecture spécifique. Si vous achetez ce coin lecture et que vous n'en avez jamais fait auparavant (comme moi), vous trouverez les vidéos ici : Vidéos de la librairie Eternal. Les deux premières vidéos de ce lien sont celles que j'ai regardées et que j'ai mises en favoris pour référence ultérieure.
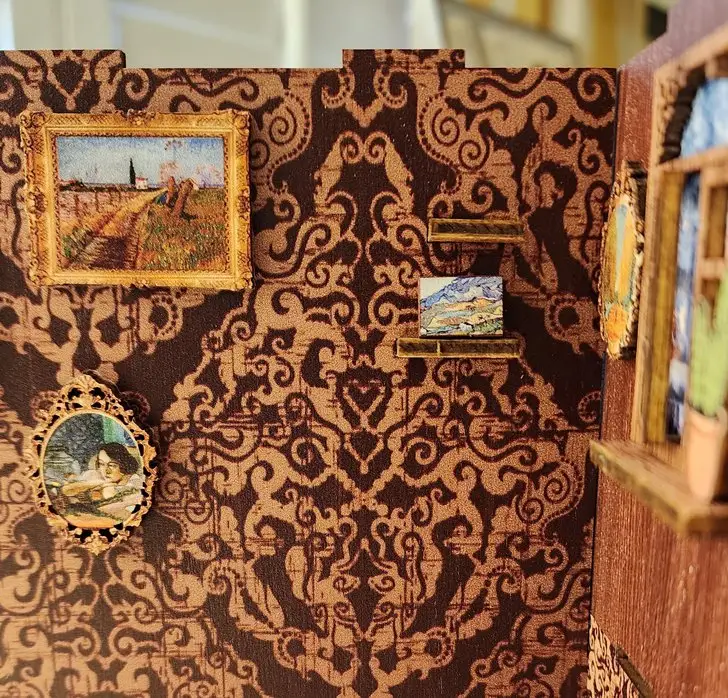
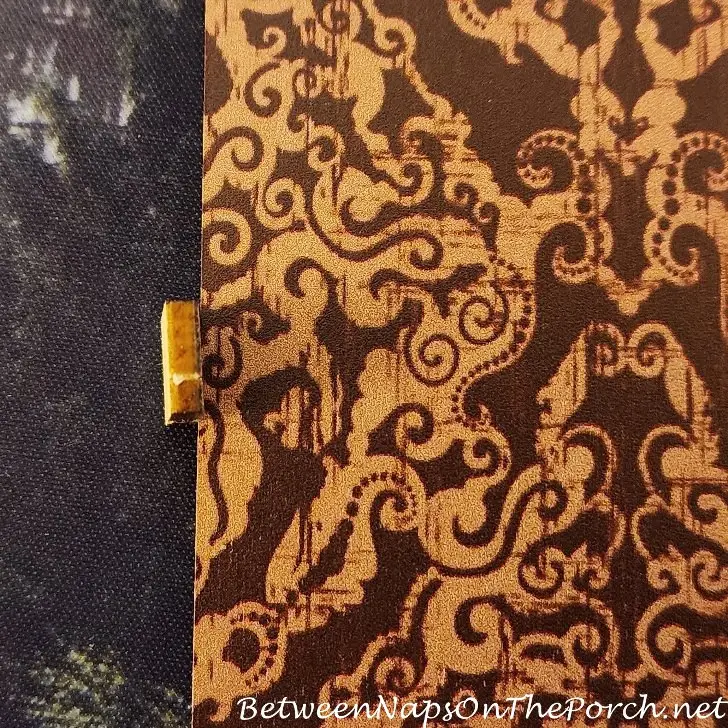
Je veux partager quelques conseils que j'ai trouvés utiles dans les vidéos et dans les critiques de ces kits en ligne. Au fur et à mesure que vous découpez les petits morceaux de bois, il y aura quelques aspérités là où ils étaient initialement fixés. Le kit est livré avec une petite lime pour lisser ces aspérités. Ensuite, j'ai utilisé mes marqueurs à taches pour retoucher les endroits plus clairs où ils avaient été fixés. (Vous pouvez voir l'un de ces points plus clairs sur ce petit morceau ci-dessous qui a été conçu pour soutenir le petit livre sur l'étagère.) Si vous n'avez pas de marqueurs de taches, je vous les recommande vivement. Ils sont géniaux pour retoucher les rayures sur les meubles. Vous en trouverez ici : Marqueurs de taches pour bois pour retouches et ici : Marqueur pour bois pour retouches.
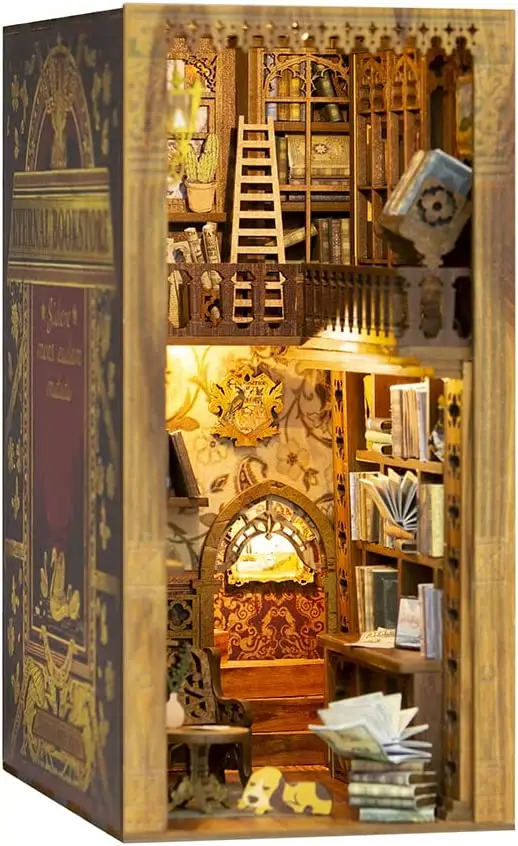
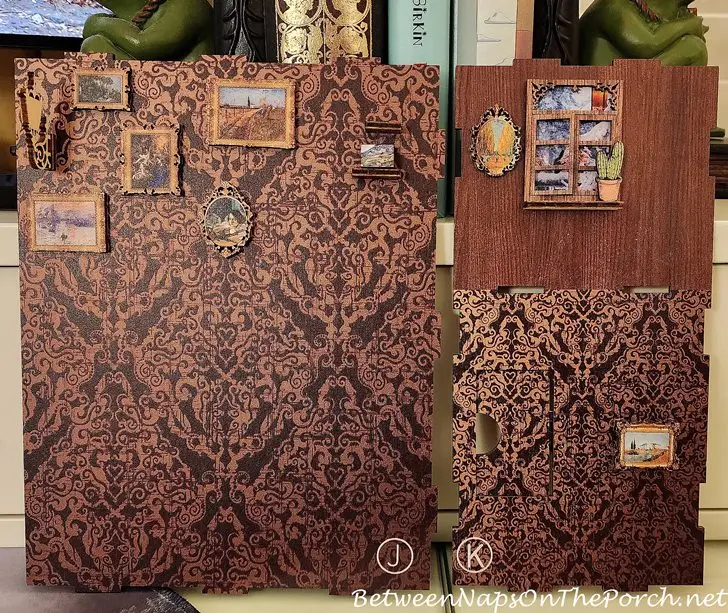
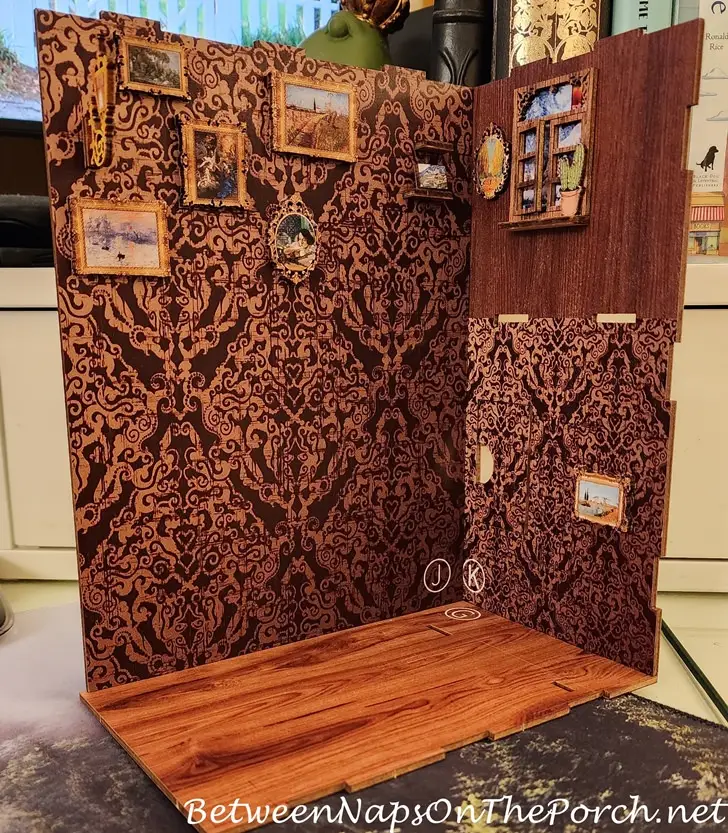
Autre conseil : j'ai trouvé utile d'écrire au crayon le numéro de la pièce au dos de chaque pièce au fur et à mesure que je les découpe. Si vous avez découpé plusieurs pièces, cela permet de vous assurer que vous avez bien fait.en utilisant la bonne pièce lorsque vous commencez à les assembler. Voici donc mes progrès jusqu'à présent. Malgré mes contretemps initiaux, je me suis beaucoup amusée avec ce kit ! Pour la colle, j'ai principalement utilisé la colle Tacky Glue d'Aleene qui a l'air blanche lorsqu'elle sort pour la première fois, mais qui devient transparente en séchant. Elle est disponible ici : Aleene's Tacky Glue. Pour quelques endroits, comme les étagères, j'ai utilisé un tout petit peu de super glue, mais je pense que la colle adhésive aurait très bien fonctionné si cela ne vous dérange pas d'attendre quelques minutes qu'elle prenne. J'étais impatiente et je voulais aller de l'avant et placer le tableau sur l'étagère (comme on le voit ci-dessous), c'est pourquoi j'ai utilisé de la super glue pour les deux petites étagères.
Une autre colle que j'ai vu recommandée dans une vidéo est la colle Uhu. J'en ai acheté hier soir et elle devrait arriver dans environ une semaine, mais j'aurai peut-être fini d'ici là. J'ai quand même pensé qu'il serait bon de l'avoir sous la main car je pense que je ferai plus de ces jolis recoins à l'avenir. Vous trouverez Uhu Glue ici : Uhu Glue.
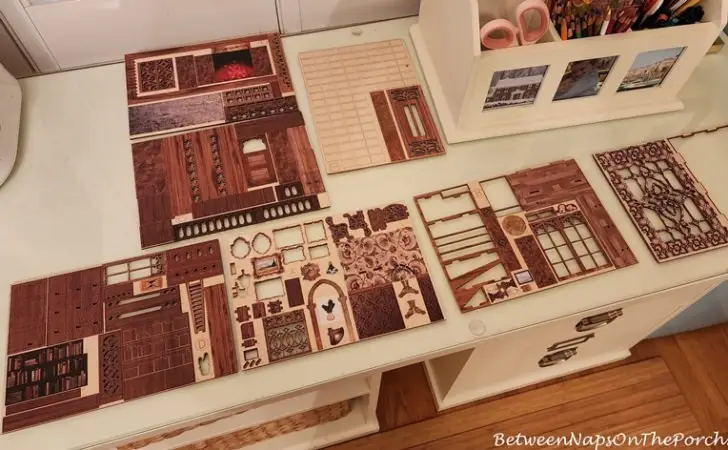
Voici les pièces restantes avec lesquelles je vais travailler ensuite. C'est comme faire un puzzle 3D et j'apprécie vraiment le processus, quand je ne laisse pas tomber des objets et que je les colle à l'envers. Ha !
Je partagerai cet adorable coin lecture une fois terminé. J'ai déjà quelques endroits en tête où je vais le placer une fois terminé. Avez-vous déjà assemblé un petit coin lecture ? Si oui, où avez-vous placé le vôtre une fois terminé ?a été achevée? Avez-vous une marque particulière de coin lecture que vous aimez vraiment ? J'adorerais entendre parler de votre expérience dans la réalisation de ces produits !
J'attends avec impatience tous les superbes avant et après liés pour le Met Monday de cette semaine !
Pssst : Le saviez-vous Between Naps On The Porch est sur Instagram ? Vous me trouverez sur Instagram ici : Between Naps On The Porch. Vous souhaitez savoir quand un nouvel article de blog est publié et disponible à la lecture ? Abonnez-vous aux mises à jour par e-mail, c'est gratuit et votre e-mail ne sera jamais partagé. Abonnez-vous pour recevoir des mises à jour gratuites par e-mail ici : Abonnez-vous.
Lundi métamorphose : Le lundi métamorphose est une fête entièrement consacrée à l'avant et à l'après. Veuillez relier vos projets avant et après comme les projets de bricolage, la rénovation de pièces, les projets d'artisanat et même les recettes. Veuillez ne pas associer les paramètres de table, conservez-les pour notre soirée Tablescape Thursday de jeudi. Si vous participez au Met Monday, vous devrez lier votre publication à la fête en utilisant le « lien permanent » vers votre publication MM et non l'adresse générale de votre blog. Pour obtenir votre lien permanent, cliquez sur le nom de votre article, puis copiez et collez l'adresse qui apparaît dans la barre d'adresse en haut de votre blog, dans la case « URL » d'InLinkz lorsque vous y êtes invité. REMARQUE : Veuillez ne pas créer de lien vers plus de trois articles de votre blog. Pour créer un lien, vous devrez inclure un lien dans votre message vers le fête pour que les visiteurs de votrele blog peut trouver les autres participants du parti. Lorsque vous vous connectez à la fête, donnez au système InLinkz le temps de trouver le lien dans votre message afin d'éviter que votre lien soit retenu pour modération/approbation. Merci !