Comment faire pousser un jardin comestible à peu près n'importe où
Vous aimeriez pouvoir cultiver un jardin comestible, mais vous n'avez tout simplement pas d'endroit pour le faire ? J'ai une bonne nouvelle. Même si vous louez et que votre propriétaire ne vous autorise pas à déterrer une partie de la propriété, pas de problème.
Même si vous n’avez pas le temps de vous occuper d’un grand jardin ; même si vous n’avez ni le temps ni les ressources pour construire des boîtes d’un pied carré. Même dans un petit jardin, vous pouvez cultiver beaucoup de légumes différents et profiter d’une belle récolte pour vos efforts. Rien n'est comparable à cuisiner avec des légumes que vous avez cultivés vous-même.
Vous n'avez pas besoin d'une superficie, d'un grand jardin ou de conditions « parfaites ». En fait, vous n’avez vraiment pas besoin d’un jardin. Vous pouvez commencer dès aujourd’hui à cultiver votre propre nourriture de multiples façons. C'est aussi facile !
Sur un rebord de fenêtre
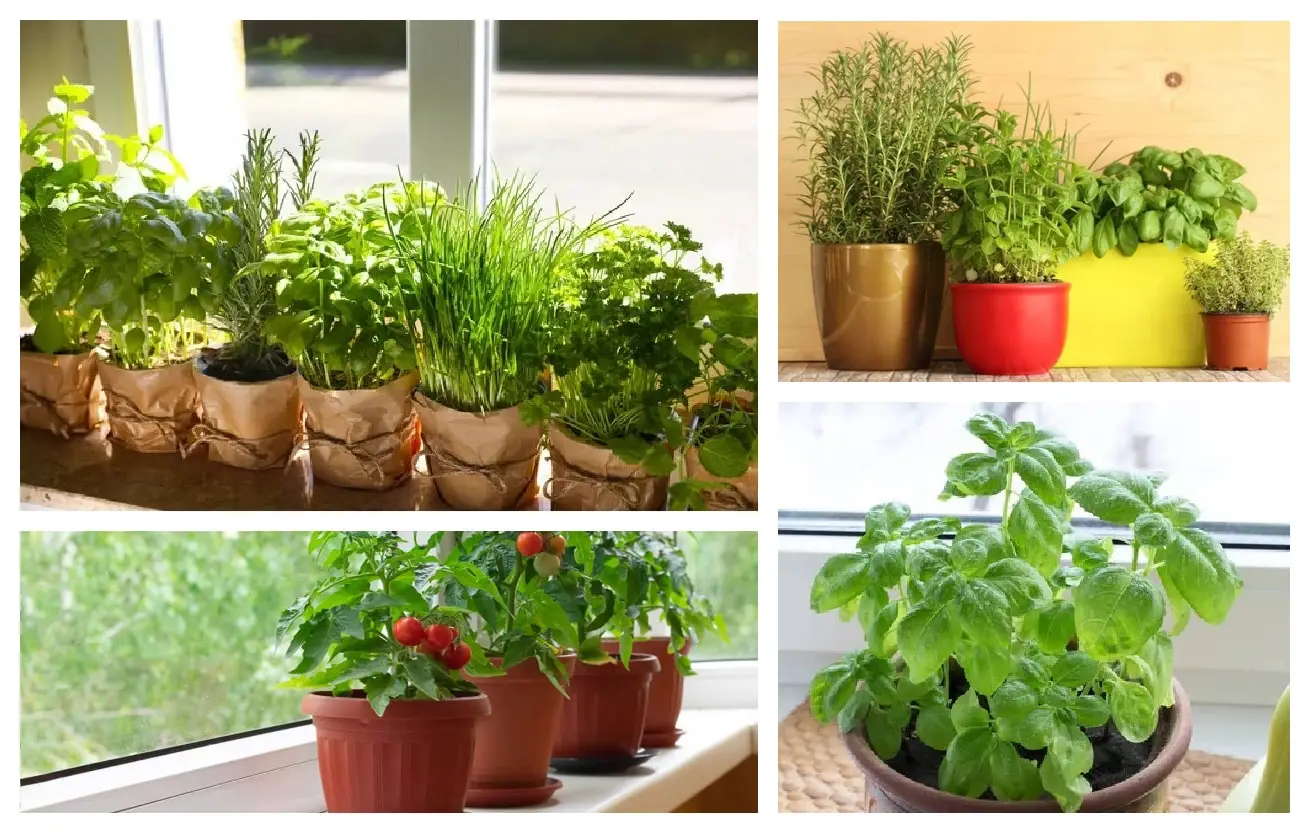
Vous n'avez donc pas de terrasse, de patio ou de cour arrière. Ou peut-être que vous les avez tous mais que vous n’avez aucune envie de jardiner à l’extérieur. Vous avez une fenêtre avec un rebord ? Vous pouvez faire pousser un jardin sur le rebord de la fenêtre ! Préparez-vous pour une nouvelle aventure.
Cela signifie que même si vous vivez en appartement, vous pouvez trouver l'espace pour cultiver de la nourriture et embellir votre espace en même temps. Tout ce qu'il faut, c'est un rebord de fenêtre bien éclairé, des pots, des plantes et une bonne attitude. Le reste va se faire tout seul.
Vous devrez sélectionner le bon endroit, le bon contenant et les bonnes plantes, mais c'est facile. Jetez un œil à Comment faire pousser un rebord de fenêtreJardin d'herbes aromatiques, de la plantation à la récolte, et vous ferez du jardinage de fenêtres en un rien de temps !
Sur une terrasse ou un patio
Même dans un petit espace comme une terrasse ou un patio, vous pouvez cultiver de nombreux légumes différents et profiter d'une récolte incroyable grâce à vos efforts. Il n'y a rien de tel que de préparer des repas avec des herbes et des légumes que vous avez cultivés vous-même et que vous pouvez récolter frais, juste devant votre porte arrière.
Découvrez ces 11 conseils pour faire pousser des légumes sur une terrasse ou un patio.
Dans un pot
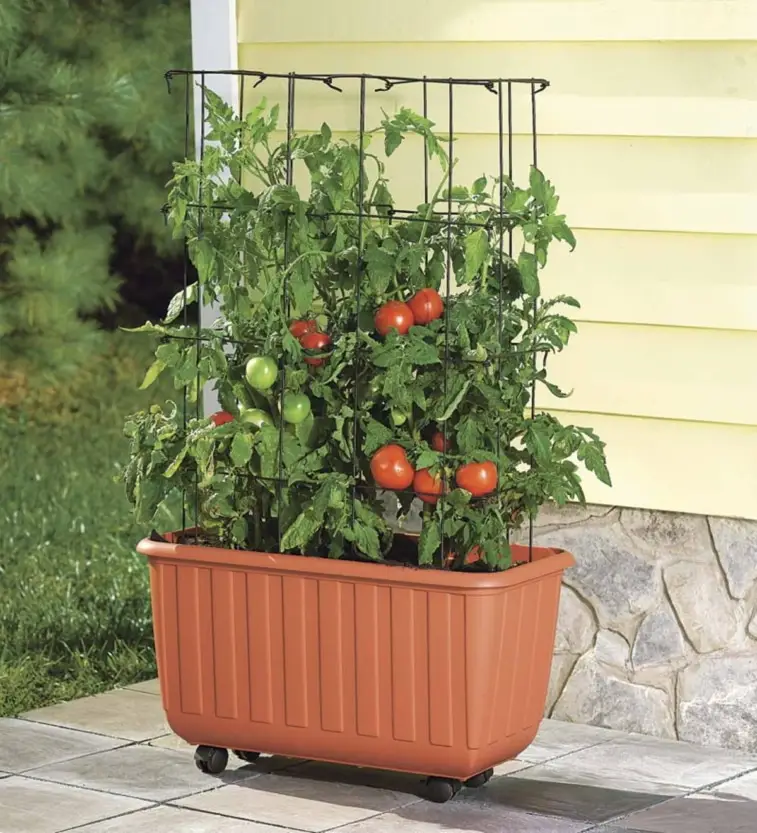 Vous pouvez vraiment cultiver une quantité incroyable de nourriture dans un pot ou deux : je parle de poivrons, de concombres, de tomates et de toutes sortes d'herbes. Le pot peut être en plastique, en bois ou en terre cuite. Et voici ce qui est bien : vous pouvez déplacer les pots en fonction de la quantité de soleil dont ils ont besoin ou de l'ombre.
Pour en savoir plus sur le bon type de sol à utiliser et comment procéder avec précision, consultez cet excellent article. tutoriel avec vidéo, Comment cultiver un potager en pot abondant, de nos amis et Better Homes and Gardens. Vous allez adorer ça !
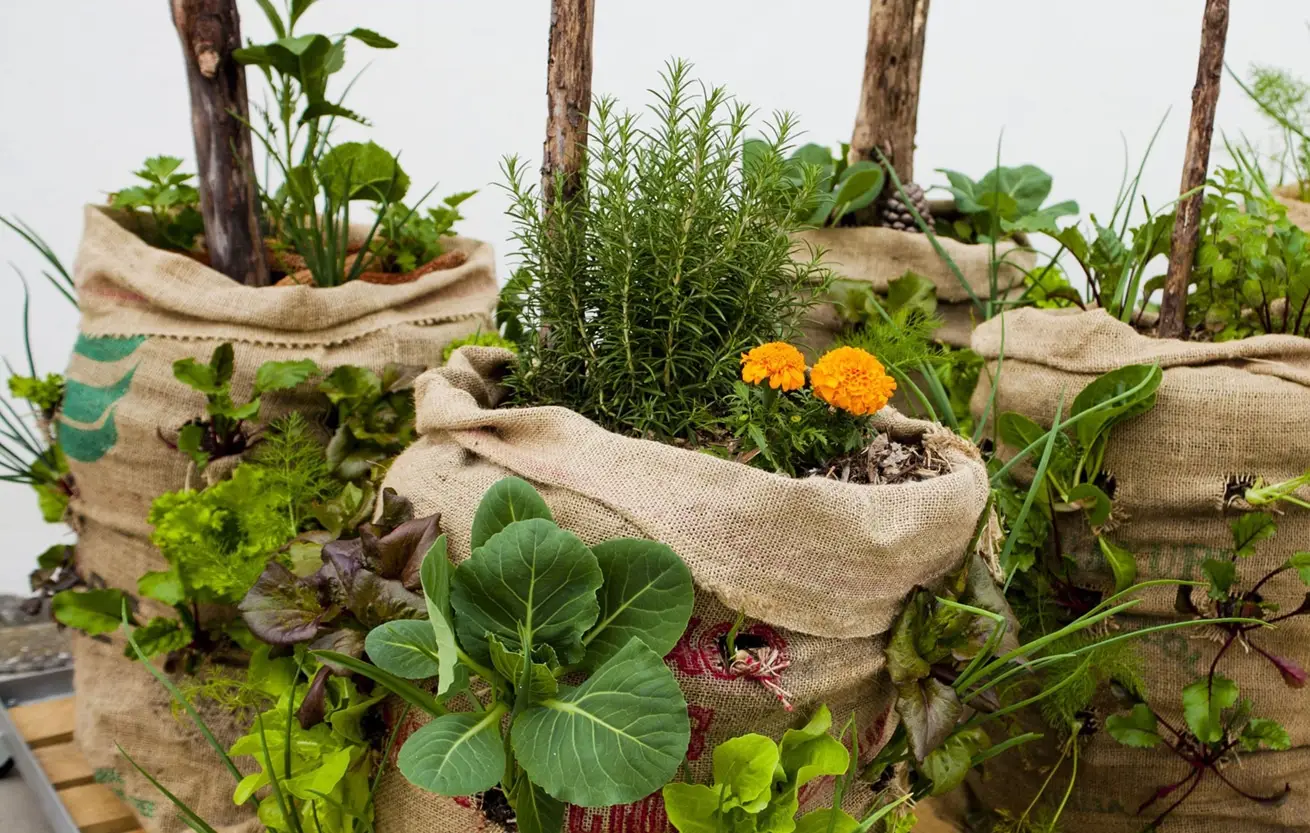
Dans un sac poubelle en plastique
Sérieusement, vous pouvez faire pousser un jardin dans un sac poubelle. La façon la plus simple de commencer à cultiver des choses dans des sacs en plastique est d’utiliser des pommes de terre. Pour commencer, vous aurez besoin d'un sac poubelle noir robuste, d'une pelle, d'un couteau, de terreau, de pommes de terre de semence et de soufre agricole, disponibles en ligne ou dans n'importe quelle jardinerie.
Trouvez un produit complet. tutoriel étape par étape pourComment faire pousser votre sac sur Grow Bags For Potatoes : Conseils pour faire pousser des pommes de terre en sacs.
Comment faire pousser un jardin en sac
-
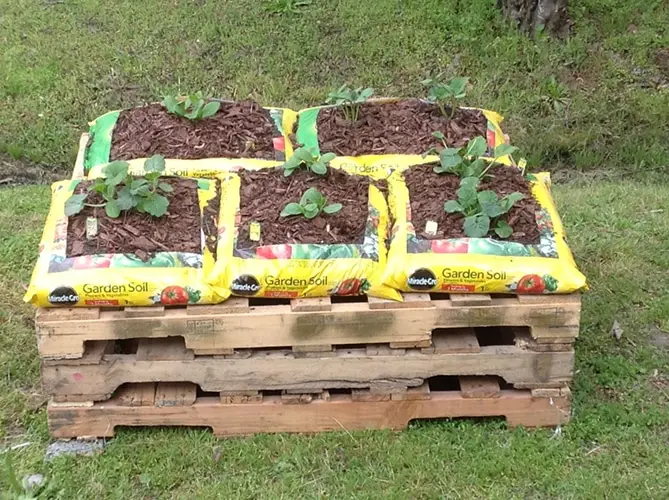 Placez un sac de terre végétale achetée dans une zone qui reçoit le plein soleil et qui est pratique pour l'arrosage.
 - À l'aide d'un couteau utilitaire, coupez plusieurs fentes dans le sac pour permettre le drainage.
- Retournez le sac, de sorte qu'il repose à plat sur son autre côté. Manipulez le sol jusqu'à ce qu'il soit lisse et de niveau à l'intérieur du sac. Les sacs sont souvent empilés à plat sur des palettes dans les magasins et conservent cette forme, et ont une profondeur de sol constante de 4 pouces à moins que vous ne les mettiez debout.
- Découpez une fenêtre rectangulaire à environ 2 pouces des bords du sac sur tous les côtés avec votre couteau utilitaire ; jetez le morceau de plastique au centre. Le cadre en plastique autour des bords aidera le sol et l'humidité à rester dans le sac.
- Saupoudrez une poignée d'engrais à libération lente sur la couche supérieure du sol (engrais qui n'est pas étiqueté comme contenant déjà de la nourriture pour plantes). Travaillez-le légèrement avec une truelle à main.
- Plantez des graines telles que la laitue, la bette à carde, les betteraves ou les pois nains au début du printemps lorsque les températures sont encore fraîches. Suivez les recommandations d'espacement sur le paquet de graines, bien que vous puissiez généralement planter un peu plus près. Vous pouvez semer un paquet entier de graines de laitue dans un jardin-sac, ou 1/2 paquet de graines de betterave ou de pois mange-tout. Plantez deux pommes de terre de semence par sac ou 12 oignonscommence, également au début du printemps.
- Plantez un plant de tomate par sac, ou plantez deux poivrons ou semez un demi-paquet de graines de haricots nains par sac lorsque la température du sol est constamment supérieure à 70 degrés Fahrenheit. La terre contenue dans les sacs peut se réchauffer plus rapidement que la terre de jardin standard, en particulier si elle se trouve sur une surface dure qui absorbe la chaleur comme le béton ou l'asphalte.
- Si vous placez le sac sur le sol, vous souhaiterez peut-être le couvrir. Ajoutez-y du paillis pour améliorer l'apparence de votre jardin de fortune, aidez le sac à retenir l'humidité et isolez les racines des plantes de la chaleur estivale.
- Arrosez régulièrement, en fournissant au moins 1 pouce d'eau par semaine, ou chaque fois que le pouce supérieur de le sol est sec.
Conseils de jardinage amusants
Une fois que vous avez commencé, voici une collection de conseils de jardinage aléatoires pour favoriser votre réussite et votre plaisir dans les jardins de toutes tailles, de la superficie aux rebords de fenêtre.
Nettoyez les ongles
Éliminez la saleté sous vos ongles en grattant un pain de savon avant de commencer. Lorsque vous avez terminé, lavez-vous soigneusement les mains. Le savon se lavera proprement sous vos ongles.
Cravates de chemin de fer
Évitez d'utiliser des traverses de chemin de fer dans ou autour de votre potager. Les produits chimiques utilisés comme conservateurs pour empêcher le bois de pourrir sont désormais considérés comme toxiques et nocifs.
Faites-le vous-même
Contrôlez l'oïdium avec du lait. Diluez 1 volume de lait dans 9 volumes d'eau etvaporisez sur les plantes.
Touche de maître
Brossez doucement vos mains sur vos minuscules plants plusieurs fois par jour. Cela les stimule à pousser légèrement plus lentement, ce qui donne des tiges plus fortes et plus robustes.
Un « chiffon » anti-mauvaises herbes gratuit
Utilisez des journaux comme barrière contre les mauvaises herbes lors de la création d'un nouveau lit. Ils sont imprimés avec de l'encre de soja, se décomposent bien et sont simples à remplacer une fois décomposés. Utilisez uniquement des pages en noir et blanc, pas des publicités en couleur ou des pages en couleur. Une fois en place, recouvrez le papier journal de paillis.
Paillis gratuit
Le marc de café et de thé constitue un excellent paillis autour des plantes acidophiles. La caféine est un engrais naturel, mais n’en abusez pas, car une trop grande quantité pourrait favoriser une croissance excessive des feuilles et diminuer la production de fruits. Dans le cas du marc de thé, vous pouvez le laisser dans le sachet de thé à condition qu’il soit en papier, en soie ou en mousseline. Enterrez-le dans le sol pour nourrir les plantes et offrir une délicieuse friandise aux vers. Assurez-vous simplement de supprimer les balises en premier. Ils mettent beaucoup de temps à se décomposer et peuvent être recouverts de plastique.
Des démarreurs de semences parfaits
Les cartons d'œufs en carton constituent d'excellents démarreurs de semences. Percez un trou dans le fond pour le drainage, remplissez-le de terreau, plantez vos graines et regardez-les fleurir !
Considérez les conditions
Lorsque vous choisissez des plantes pour votre cour ou votre jardin, analysez votre lumière solaire spécifique, le sol et le climat en premier. Choisissez des plantespar conséquent. Toute jardinerie disposera du personnel nécessaire pour répondre aux questions et aider à faire les sélections appropriées.
Plantes anti-moustiques
Citronnelle, eucalyptus citronné, cannelle, ricin, romarin, citronnelle, cèdre, menthe poivrée, clou de girofle. , Géranium, Verveine, Pennyroyal, Lavande, Basilic, Thym et Ail.
Terre de rempotage, s'il vous plaît
N'utilisez pas de terre de jardin comme terreau dans des conteneurs. Sa qualité et sa texture sont variables ; il peut mal s'écouler ou être trop lâche et s'écouler trop rapidement. Il est également plus susceptible de contenir des maladies, des graines de mauvaises herbes et des insectes. Faites-le correctement du premier coup en utilisant un terreau standard et vous ne serez pas déçu.
Une longueur d'avance sur le projet
Trempez les graines pour avoir une longueur d'avance sur la saison. Avant de germer, les graines ont besoin de boire de l’humidité, comme si elles étaient trempées par les pluies printanières. Une fois qu'ils deviennent dodus et gonflés, le petit embryon à l'intérieur commencera à se développer, signalant qu'il est prêt à être planté.
Protecteurs de semis
Gardez les vers gris loin des semis grâce au centre en carton du papier toilette. Rouleaux. Les vers-gris, qui sont des chenilles de papillons de nuit, rampent le long de la surface du sol, mangent la base tendre des tiges des jeunes plants et coupent les pousses au niveau des racines. Ce tube en carton protégera les semis de ces prédateurs.
Il y a quelque chose d'apaisant et de satisfaisant à se salir les mains et à regarder les choses pousser !
Publié le 27/03/22 ;Révisé, mis à jour, réédité le 30/01/24
Première publication : 16/03/2017 ; révisé : 20/05/20
Everyday Cheapskate est un service de publication indépendant et gratuit soutenu par la publicité. Nous pouvons recevoir un petit paiement d'un affilié si vous cliquez sur un lien pour acheter un produit. Vous pouvez voir un article sponsorisé par le fabricant du produit, et nous recevons une rémunération pour l'article. Nous nous soucions du contenu que nous publions et nous voulons vraiment rendre les choses plus abordables pour tous.
Everyday Cheapskate participe au programme d'associés d'Amazon Services LLC, un programme de publicité d'affiliation conçu pour nous fournir un moyen de gagner des frais en établissant des liens vers des sites affiliés à Amazon.