Fabriquer un drapeau inspiré de Pottery Barn
Bienvenue au 129e lundi de Métamorphose !
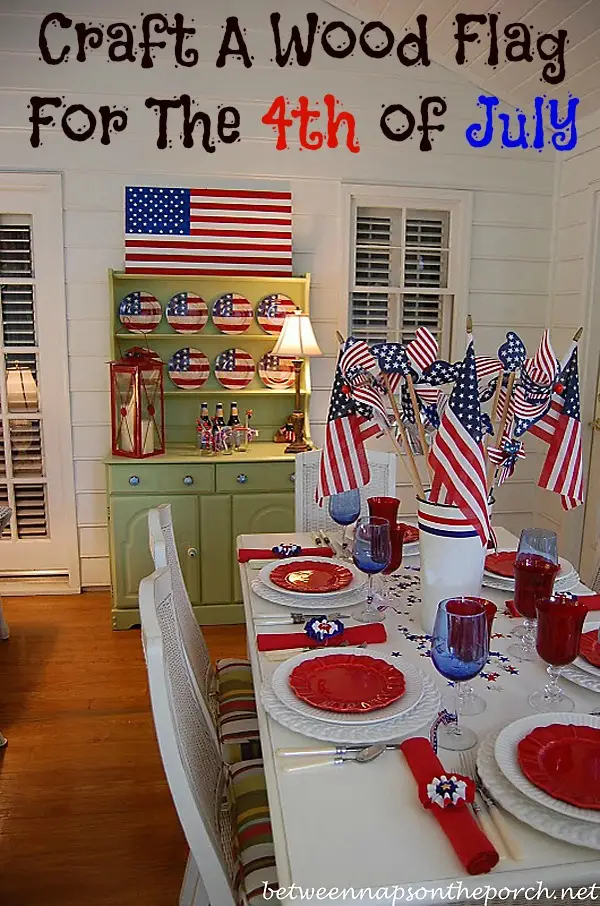
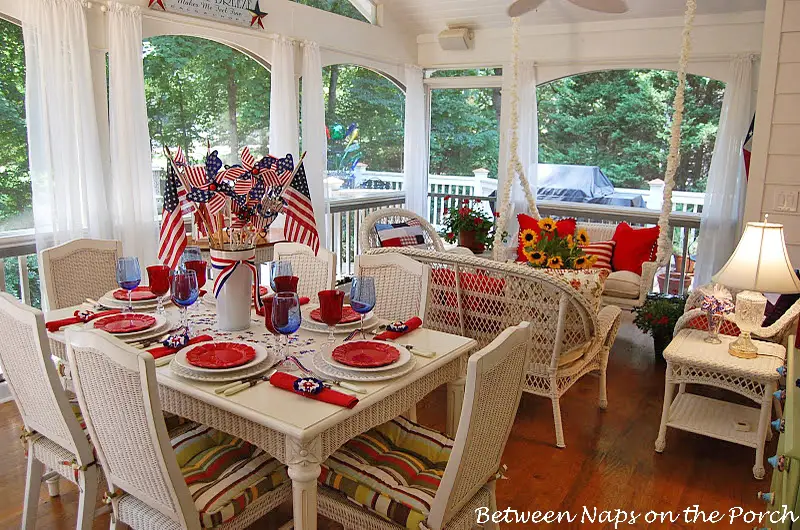
Chaque fois que le catalogue Pottery Barn apparaît dans ma boîte aux lettres, je sais que je vais être inspiré. Il y a presque toujours quelque chose là-dedans qui attire mon attention et fait tourner ces roues grinçantes dans le cerveau. Le défi est toujours de savoir comment obtenir « le look » sans le coût. Récemment, j'ai décidé de relooker complètement mon porche avec moustiquaire pour le 4 juillet.
J'avais vu un superbe drapeau dans un catalogue de Pottery Barn, mais les 129 $ le prix était bien plus élevé que ce que je voulais dépenser. De plus, le drapeau PB mesurait 50'' x 27'', trop grand pour ce que j'avais en tête.

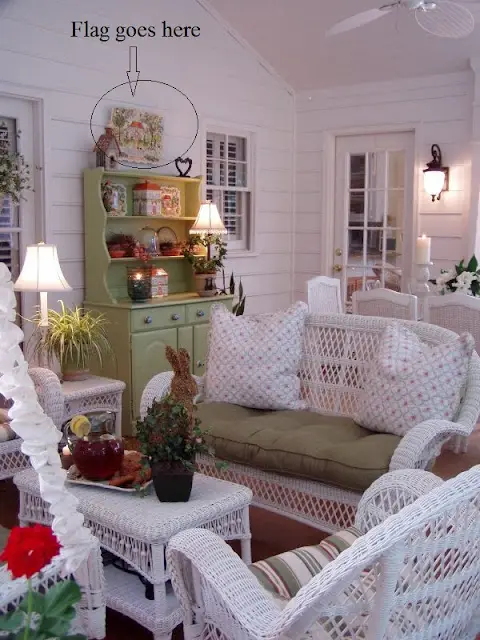
Alors, que faire ? J'ai décidé d'essayer de créer le mien. Avant de me rendre à Home Depot pour m'approvisionner, j'ai mesuré la zone où je voulais afficher le drapeau. J'ai envisagé de l'accrocher au-dessus du clapier pour refaire le porche le 4 juillet, en remplacement du grand plateau qui y habite normalement.
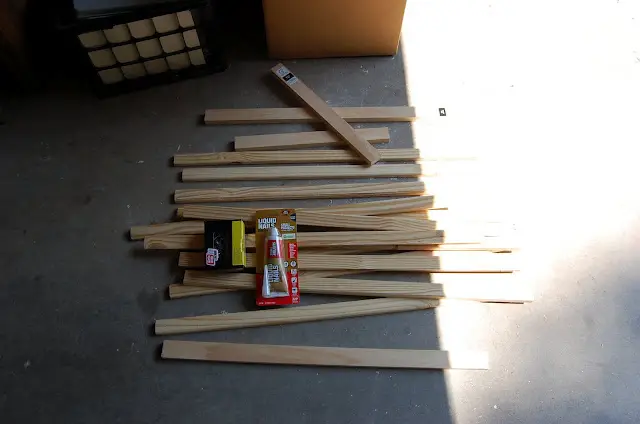
Je voulais utiliser des bandes de bois étroites pour que le drapeau aurait un aspect « assemblé », au lieu d'être découpé dans une feuille de bois solide. Quand je suis arrivé chez Home Depot, j'ai trouvé un associé, je lui ai décrit ce que je voulais faire et je lui ai demandé où je pouvais trouver des lattes de bois ou des moulures/garnitures étroites en bois. Il a immédiatement compris ce que j'essayais de faire (YAY !) et m'a montré plusieurs options différentes. L'une des choses qu'il m'a montré était un paquet de piquets de « qualité ». Ils avaient l'airconstruit à partir de piquets de signalisation de Home Depot mesurant environ 1 1/4 de large et 36 pouces de long avant que les extrémités pointues ne soient coupées. Une fois les pointes coupées, les piquets mesuraient 32 pouces de long.
Couleurs de peinture : peinture acrylique (achetée chez Michael's)
Apple Barrel, blanc, 20503
Apple Barrel, True Bleu, 20383
Americana, rouge cerise
Autocollants étoiles :
Achetés chez Office Depot
Mesures du drapeau :
Pièces latérales de la base/du cadre : 16 1/2'' de long chacune
Pièces supérieures et inférieures de la base/du cadre : 28 1/2'' de long chacune
Taille de la région du canton :
12 1/2" de large x 9" de haut
Taille du drapeau fini :
32" de large par 17" de haut
Coût de construction :
Piquets en bois : 5,97 $
Peinture : 1,98 $
Autocollants : 1,99 $
Clous liquides : 3,47
Total : 13,41 $
Pssst : Je publie presque quotidiennement sur Instagram. Suivez Entre les siestes sur le porche sur Instagram ici : Entre les siestes sur le porche.
J'attends avec impatience tous les « avant et après » pour ce lundi de la métamorphose !

Lundi Métamorphose.
Si vous participez au Lundi Métamorphose, vous devrez lier le lien permanent à votre article MM et non à l'adresse générale de votre blog. Pour obtenir votre permalien, cliquez sur le nom de votre article, puis copiez et collez simplement l'adresse qui apparaît dans la barre d'adresse en haut de votre blog, dans la case « URL » pourInLinkz.
Si vous souhaitez inclure le bouton MM dans votre message, copiez et collez simplement le bouton Met Monday sur votre ordinateur ou récupérez le code HTML situé sous le logo MM sous « Rejoindre une soirée blog ». " en-tête en haut de ce blog.
Pour créer un lien, vous devrez inclure un lien dans votre message MM vers le blog hôte, Entre les siestes sur le porche afin que vos lecteurs réguliers soient Vous pourrez trouver la soirée Met Monday qui garantit que vos amis et collègues blogueurs recevront également de nombreuses visites. N'est-ce pas ça, une fête ?

Le clapier mesure environ 37 pouces de large et les piquets mesuraient 36 pouces de long dans leur état actuel, donc je savais qu'ils seraient à peu près parfaits. Je voulais que le drapeau fini mesure environ 32 à 34 pouces de largeur et environ 17 à 18 pouces de hauteur. J'avais prévu de scier la partie pointue des piquets en rentrant chez moi, mais le gentil gars de Home Depot m'a proposé de les passer dans sa scie géante. C'est du service, ou quoi ?! Je l'ai définitivement accepté dans cette affaire ! Je ne voulais pas vraiment que les clous apparaissent sur le devant du drapeau, alors j'ai acheté un tube de « Liquid Nails ». Le gars de HD n'était pas trop sûr de ce plan et m'a suggéré d'acheter aussi une boîte de clous... juste au cas où. Au final, les Liquid Nails étaient tout ce dont j'avais besoin, à l'exception du cadre que j'ai cloué avec des petits ongles fins que j'avais déjà à la maison.
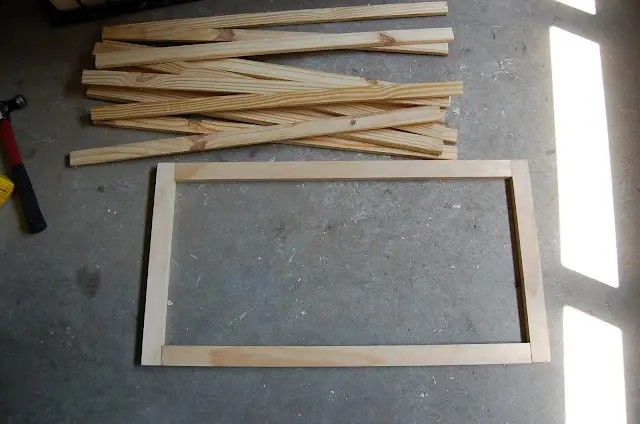
Vous verrez ci-dessous les piquets avec les pointes déjà coupées. , et les « pièces de cadre » que l'associé de Home Depot a coupées à la taille que j'ai demandée. Vous verrez également le tube de Liquid Nails, ainsi que la boîte de clous que j'ai achetée mais que je n'ai pas utilisée.
J'ai utilisé des ongles que j'ai déjà dû mettre cadre de base ensemble. Je n’ai pas utilisé de Liquid Nails dans les coins, mais cela n’aurait pas été une mauvaise idée. J'ai percé les trous pour les clous parce que je ne voulais pas briser les maigres pièces du cadre. Le haut et le basles pièces du cadre de base mesurent chacune 28 1/4 pouces et les pièces latérales mesurent 16 1/2 pouces de long chacune. J'ai demandé au gars de Home Depot de les couper à cette taille parce que je voulais que le cadre de base soit plus petit que le drapeau fini. De cette façon, lorsque je collerais les bandes de bois sur le cadre, celui-ci ne serait pas visible de face. C'était mon plan... Je croisais les doigts pour que ça marche.
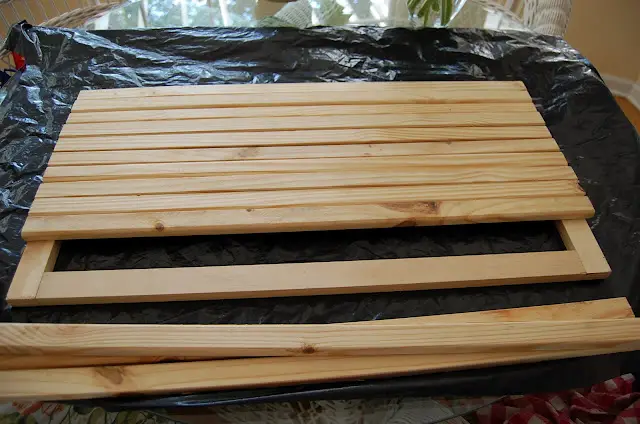
J'ai ramené les bandes de bois et le cadre à l'intérieur et j'ai créé le drapeau dans le confort climatisé. de la salle du petit-déjeuner. Il faisait très chaud dans ce garage quand je construisais la charpente ! J'ai posé les enjeux à travers le cadre pour tester mon plan. Lorsque je travaille sur un projet, j'essaie toujours de « simuler » autant que possible avant de m'engager et de commencer à clouer, coller, peindre, etc... C'est l'ancienne théorie : mesurer deux fois et couper une fois.
À l'aide d'un crayon, j'ai dessiné la zone où se trouveraient les étoiles. Il n’y avait pas de mesure exacte pour cette pièce. Je viens de mettre un drapeau en ligne, j’ai remarqué que la section étoilée (connue sous le nom de canton) n’allait pas tout à fait au centre du drapeau et je l’ai observé à partir de là. J'ai pris soin de décompter et de m'assurer que le canton ne s'étendait pas plus bas que la 7ème bande puisque c'est comme ça sur un vrai drapeau.
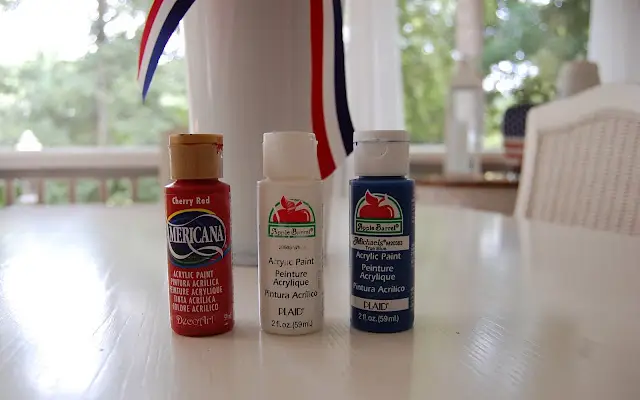
J'ai décidé de tout peindre les rayures avant d'utiliser les Liquid Nails pour les fixer à la base. Après mon voyage chez Home Depot, je m'étais arrêté chez Michaelet j'ai ramassé quelques petites bouteilles de peinture. J’ai choisi Cherry Red d’Americana et Apple Barrel’s White (205803) et True Blue (20383). J'ai également acheté un autre rouge appelé Americana Primary Red, mais après avoir testé les rouges au dos du drapeau, j'ai préféré le Cherry Red.
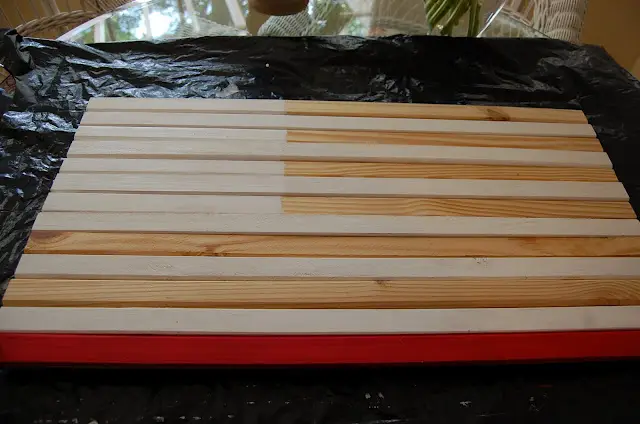
J'ai commencé par peindre tous les rayures blanches d'abord, dont un fond blanc pour le canton. Vous comprendrez pourquoi j'ai peint cette section en blanc en une seconde.
J'ai peint une deuxième couche de peinture blanche sur la zone du canton pour qu'elle soit d'un blanc éclatant.

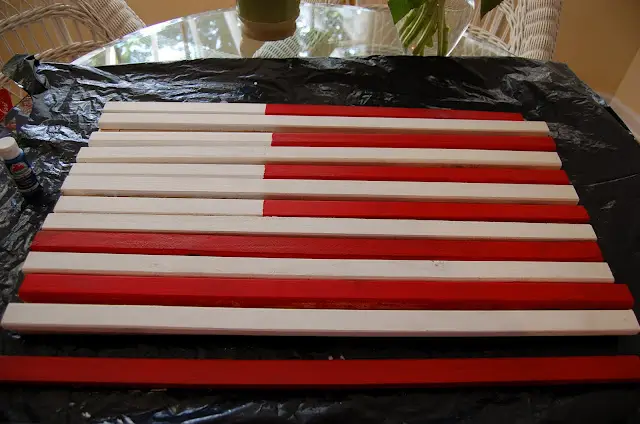
Les bandes/piquets individuels n'étant toujours pas collés, j'ai ensuite commencé à peindre les bandes rouges. J'ai juste apporté chaque morceau de bois sur le comptoir de la cuisine et je l'ai peint pendant que je regardais la télévision. Il n’a pas fallu longtemps pour les peindre et c’était en fait plutôt amusant. 🙂 Peindre chaque bande de bois (rayure) avant de coller le drapeau ensemble a rendu le drapeau très facile à peindre. Aucun risque d'avoir de la peinture blanche sur les rayures rouges ou de la peinture rouge sur les rayures blanches.
Sur cette photo, toutes les rayures ont été peintes. Les tronçons de bois sont étalés en séchant et ne sont toujours pas collés au socle.
Ensuite, à l'aide des Clous Liquides, j'ai collé les bandes de bois sur le socle que j'avais construit. Apparemment, j'ai oublié de prendre des photos pendant le processus de collage (mauvais blogueur), donc je vais le décrire. J'ai positionné toutes les bandes sur lecadre exactement là où je le voulais et en commençant par le haut, en descendant un à la fois, j'ai collé chaque morceau de bois à la base/cadre que vous avez vu au début de cet article.
Suivez les instructions sur le Tube d'ongles liquides. Il est préférable de projeter la colle sur le cadre de base, d'appuyer sur la bande de bois, de la laisser reposer quelques secondes, puis de la soulever et de la remettre en place. D'une manière ou d'une autre, cela aide les Liquid Nails à mieux lier tout, selon les instructions sur le tube. Liquid Nails fonctionne rapidement. Il a été fermement installé en 24 heures, mais j'ai pu déplacer le drapeau et même l'essayer sur le porche quelques heures seulement après avoir collé toutes les bandes de bois. Cependant, je ne l'ai pas laissé en position verticale (juste pour être sûr) avant 24 heures.
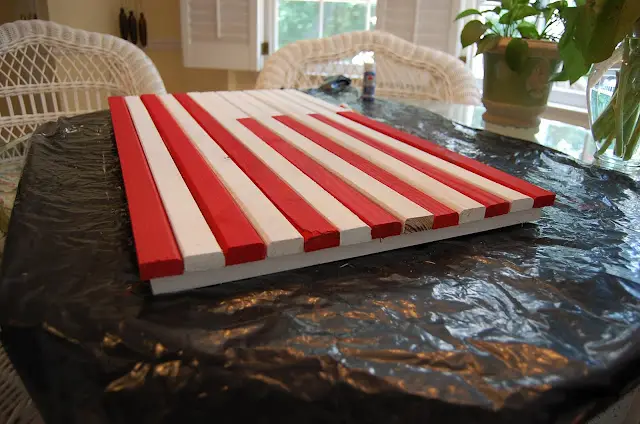
Voici une vue latérale de l'apparence du drapeau avec toutes les bandes de bois collées. Voyez comment la base que j'ai réalisée est un peu plus petite que le drapeau lui-même. Je suis sûr qu’il existe de nombreuses façons de construire ce drapeau. Vous pouvez même construire un cadre pour faire tout le tour pour un look vraiment fini.
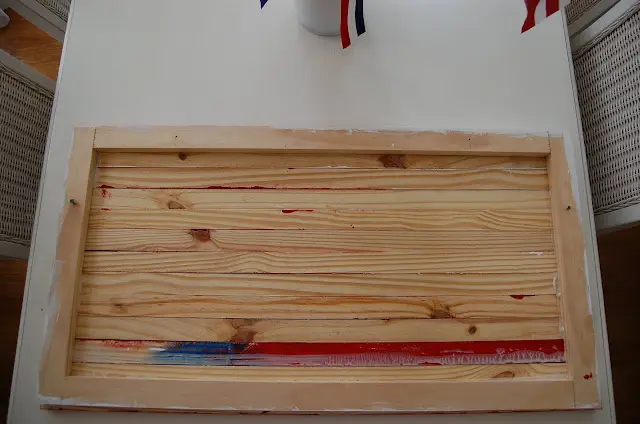
Voici une photo de l'apparence du drapeau au dos. Vous pouvez voir où j’ai testé les couleurs de peinture rouge et bleue avant de décider de les utiliser. Cette bande avec la colle séchée visible... c'est une bande que j'avais collée au bas de la base/du cadre, mais pendant le processus de collage, j'ai décidé de la déplacer vers le haut vers un autre endroit. C'est pourquoi vous pouvez voir lecollez-le par l'arrière. À un moment donné, c'était la bande inférieure.
Les piquets ne sont pas parfaits et certains sont un peu coupés/biseautés, c'est pourquoi il est utile de les essayer à différents endroits avant de commencer à les coller. Je l'ai fait, mais apparemment, j'en ai échangé quelques-uns pendant le processus de peinture, donc une fois que j'ai commencé à les coller, j'ai dû faire un petit repositionnement. Vous disposez d'environ 15 à 20 minutes avant que les Liquid Nails ne s'installent, ce qui vous laisse le temps de les déplacer. Je vous le dis, je suis une grande fan de Liquid Nails désormais. Cela a très bien fonctionné pour ce projet !
Il était maintenant temps de créer la section ou le canton étoile. Quand j'ai commencé à réfléchir à la façon dont je voulais construire un drapeau il y a quelques semaines, j'ai eu une idée qui, j'espérais, fonctionnerait pour cette section vedette. L’astuce serait de trouver des autocollants étoiles de la bonne taille. Si je ne pouvais pas, j'ai pensé que je découperais une forme d'éponge en forme d'étoile et que je la tracerais au pochoir.
Après avoir visité Home Depot et Michael's, je me suis dirigé vers Office Depot. Ils avaient des autocollants de différentes tailles et ils semblaient pouvoir fonctionner. Il y en avait 72 dans le colis et je les ai tous utilisés sauf 7. Je vais vous expliquer dans une seconde.
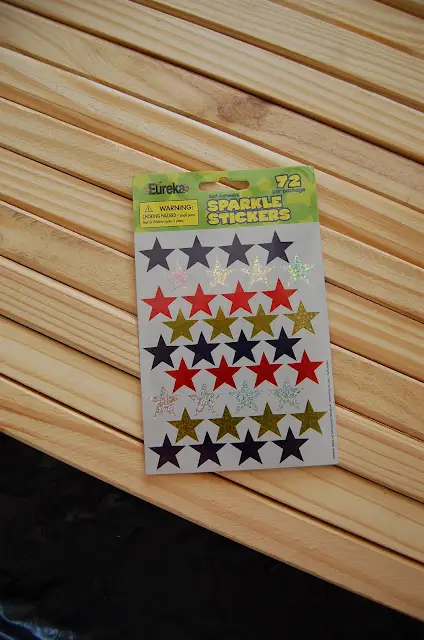
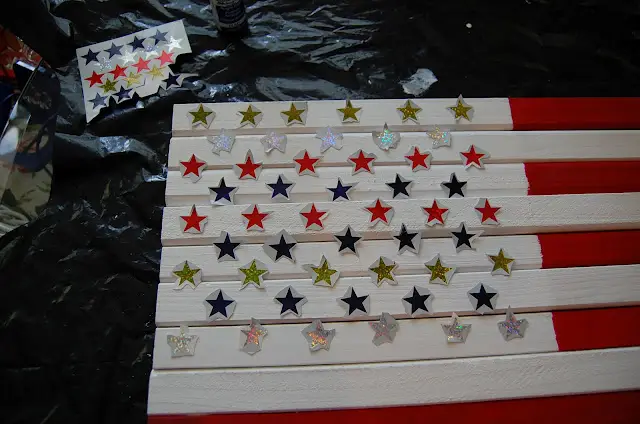
Encore une fois, j'aime tester à quoi vont ressembler les choses avant de « m'engager ». C'était pénible, vous savez quoi, mais j'ai découpé chaque autocollant et je les ai simplement placés sur la section des étoiles avant de me lancer. Ils regardèrent autourc'est vrai, alors j'ai décidé de les utiliser.
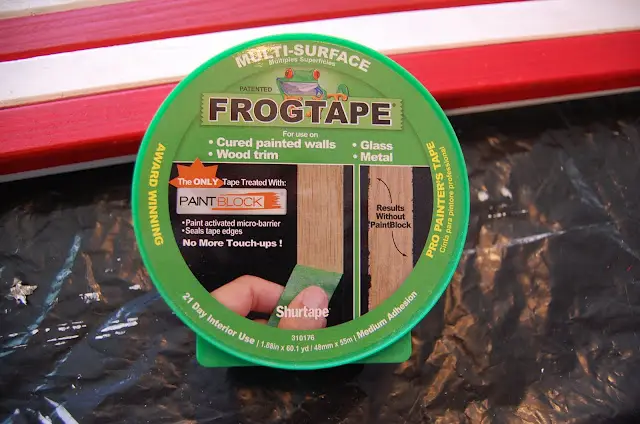
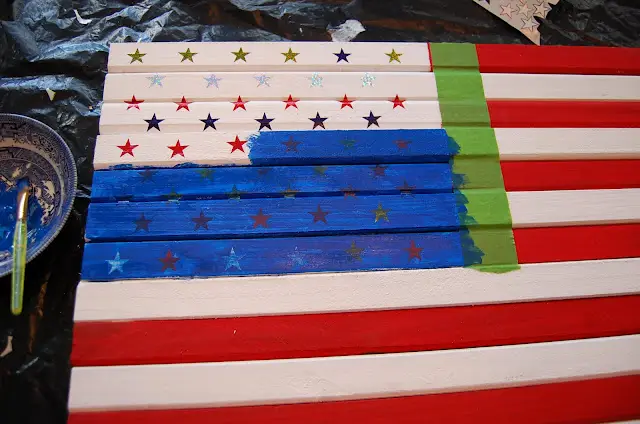
J'ai enregistré la section des étoiles avec Frog Tape. J'ai acheté ce ruban pour l'utiliser lorsque j'ai peint la moulure de mon bureau. Je ne l'ai toujours pas calfeutré ni peint, mais... pouvez-vous dire procrastination ? Le ruban Frog s'est avéré utile pour ce projet de drapeau.
J'ai décollé toutes les étoiles et les ai positionnées une par une sur le drapeau. J'ai fait la rangée du haut puis je suis passée à la deuxième rangée, etc... J'ai laissé toutes les étoiles que j'avais découpées en place pendant que je travaillais, soulevant juste celle sur laquelle je travaillais en ce moment, pour la coller. De cette façon, j'ai gardé mes lignes assez droites jusqu'à la fin. Ensuite, j'ai peint toute la zone du canton avec de la peinture « True Blue ».
J'étais heureux que le paquet contienne 72 étoiles car les étoiles étaient très fines/fragiles et parfois l'une d'entre elles se déchirait lorsque j'essayais de retirer le support. collez-le ou si je devais le remonter pour le repositionner. Au final, j'ai utilisé toutes les étoiles sauf 7.
Dans la photo ci-dessous, vous pouvez voir où je suis allé un peu plus loin avec la peinture rouge sur cette bande supérieure. qu'avec les autres rayures rouges. Pas de panique… Je savais que le bleu cacherait ça plutôt bien. Je recommande cependant d'essayer de le garder uniforme, car le bleu ne masquera pas totalement la peinture rouge.
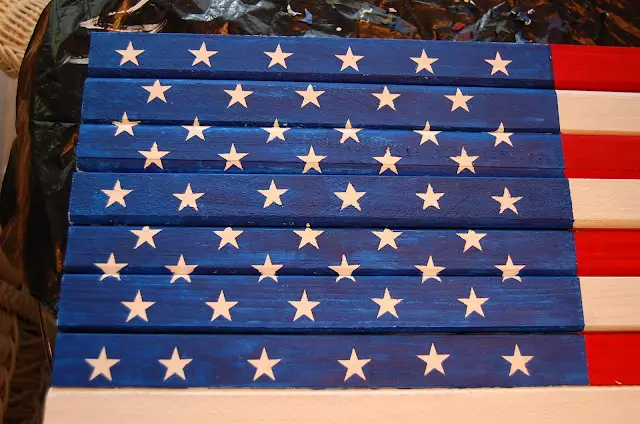
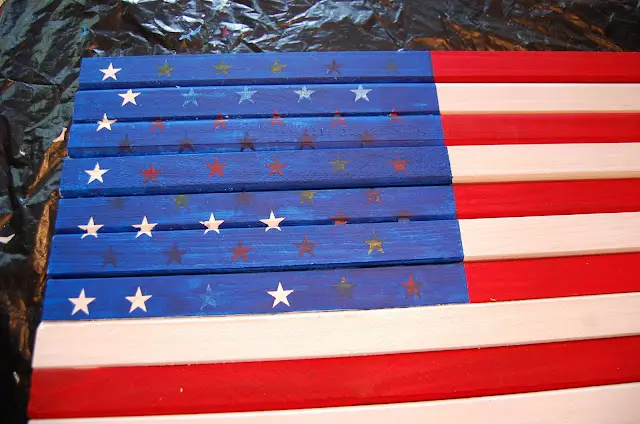
Je le laisse sécher pendant environ 15 minutes (la peinture acrylique sèche rapidement) mais avant que ce ne soit complètementUne fois sèche, j'ai pris une épingle droite et j'ai commencé à soulever les étoiles, une à la fois. J'ai juste sauté tout autour, comme vous pouvez le voir sur la photo ci-dessous. Les étoiles blanches brillantes sont celles où j'avais déjà soulevé les autocollants. C'était amusant de voir la section des étoiles prendre vie.
Maintenant, voici quelque chose que vous pouvez décider de faire différemment. Les piquets que j'ai achetés étaient plutôt plats d'un côté et biseautés de l'autre. Quelques-uns semblaient être biseautés des deux côtés, mais la plupart étaient plats d'un côté et biseautés de l'autre. J'ai choisi de mettre le côté biseauté vers le haut. J'essayais de souligner le fait que ce drapeau n'était pas un morceau de bois massif, mais qu'il était fait de bandes de bois individuelles assemblées ensemble.
Le seul inconvénient de la construction du drapeau avec le côté biseauté vers le haut est que les autocollants en forme d'étoile s'enroulent un peu autour du bord biseauté, ce qui peut donner l'impression que la pointe supérieure ou inférieure de l'étoile manque, même si ce n'est pas le cas.
Si cela vous dérange, concevez votre drapeau avec le côté PLAT du piquet tourné vers le haut et le côté biseauté vers le bas. Je le construirais probablement encore de cette façon... J'aime juste l'aspect biseauté.
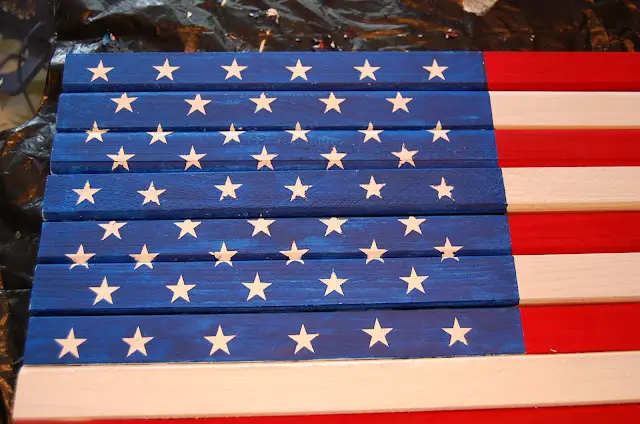
Une autre variante que vous pourriez envisager de faire est de rendre votre cadre de base plus grand que ce que j'ai fait et d'espacer un peu les bandes de bois en utilisant une pièce de monnaie ou un objet fin comme entretoise, créant de petits espaces entre les lattesen bois. J'y avais pensé, mais j'ai finalement décidé de les serrer les uns contre les autres. Je lance juste cette idée, cependant... au cas où cela vous plairait. Voici à quoi ressemblait mon drapeau après que tous les autocollants étoiles aient été retirés avec une épingle droite.
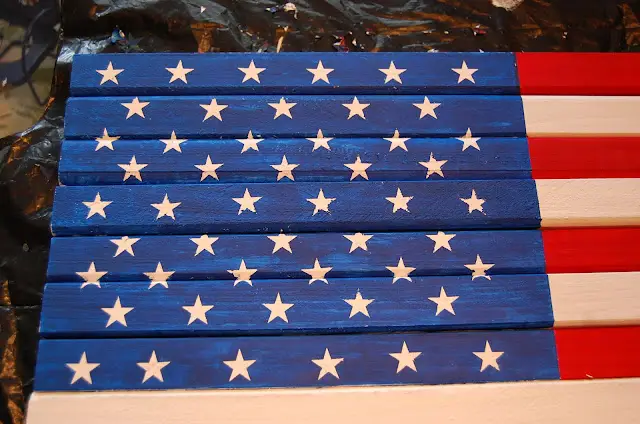
Parce que je voulais que mon drapeau soit assez net et presque parfait (avant de le vieillir ) J'ai retouché quelques étoiles avec de la peinture blanche et un pinceau très fin. Les autocollants ont très bien fonctionné, donc la seule retouche que j'ai faite était simplement due au biseautage où une pointe pouvait manquer ici ou là. La peinture avait un aspect un peu inégal, en raison de la façon dont le bois absorbait la peinture. En fait, j'aimais ça car je ne voulais pas que ça ait l'air trop, trop parfait.
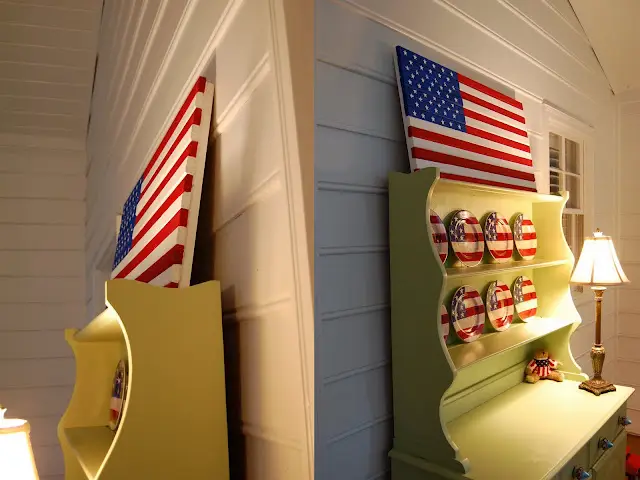
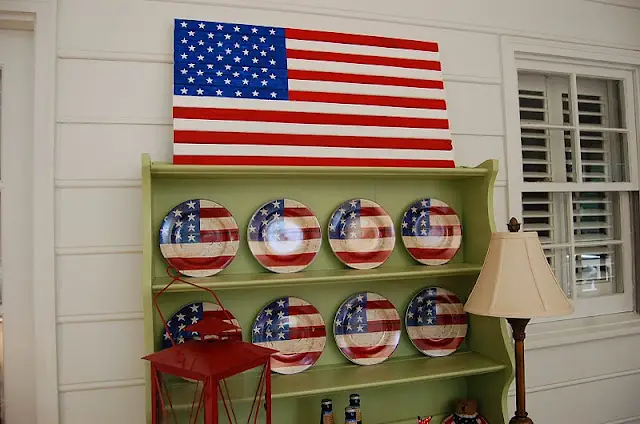
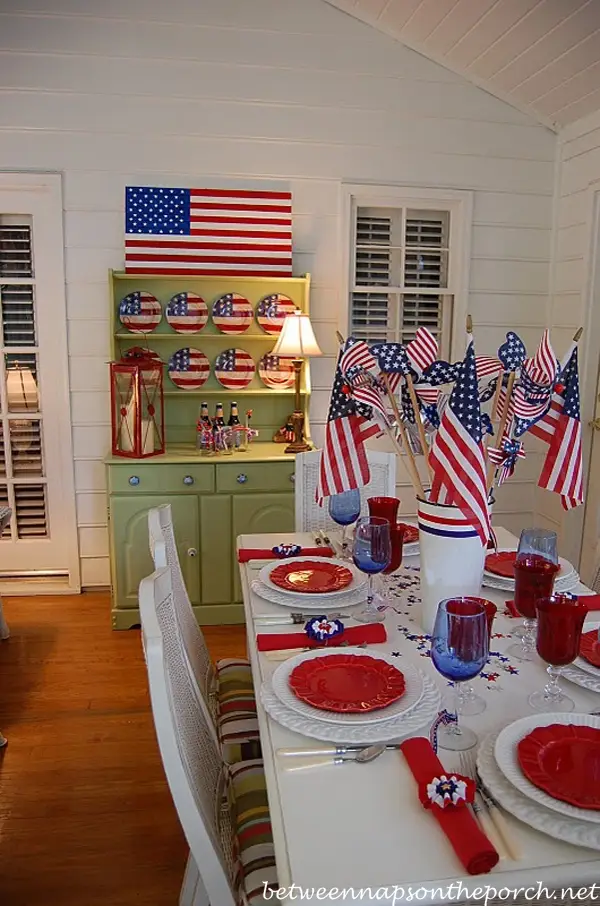
En place au-dessus du clapier...
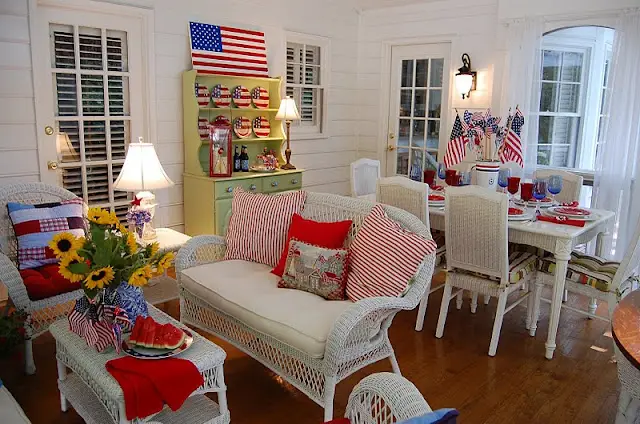
J'ai mis deux vis courtes à l'arrière lorsque j'ai initialement construit le cadre de base afin de pouvoir accrocher le drapeau avec du fil photo une fois que j'ai terminé. Mais au final, j'ai aimé le look décontracté de l'avoir simplement appuyé contre le mur.
Vues latérales...
Je n'ai pas encore abîmé mon drapeau. Je pense que je vais vivre avec ça pendant un moment... puis décider. Ce drapeau a été un travail d'amour, mais vraiment amusant à réaliser !
Voir le porche décoré pour le 4 juillet dans cet article : Porche patriotique du 4 juillet
Informations générales sur la construction :
Le drapeau était