Comment réparer un vitrage de fenêtre ébréché ou manquant
Bienvenue au 317e lundi de la métamorphose !

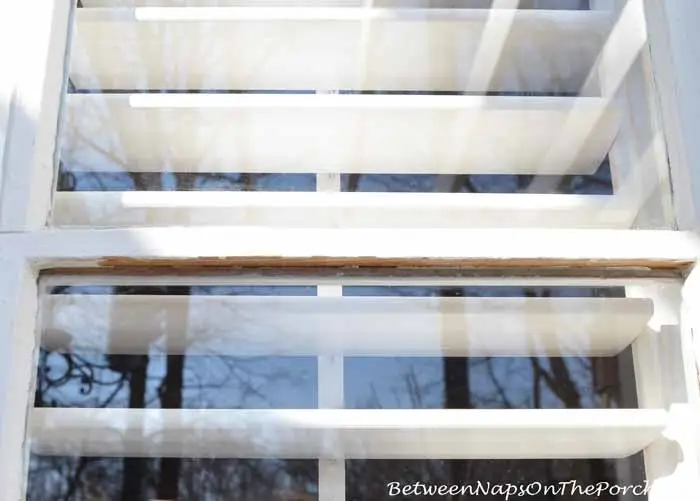
Il y a quelques années, j'ai fait peindre l'extérieur de ma maison, en fait, cela fait environ 6 ans maintenant. Wow, le temps a filé ! J'étais dehors récemment en train de remplir mes mangeoires à oiseaux et j'ai remarqué quelque chose qui pendait au-dessus d'une des vitres de la baie vitrée de ma salle à manger.
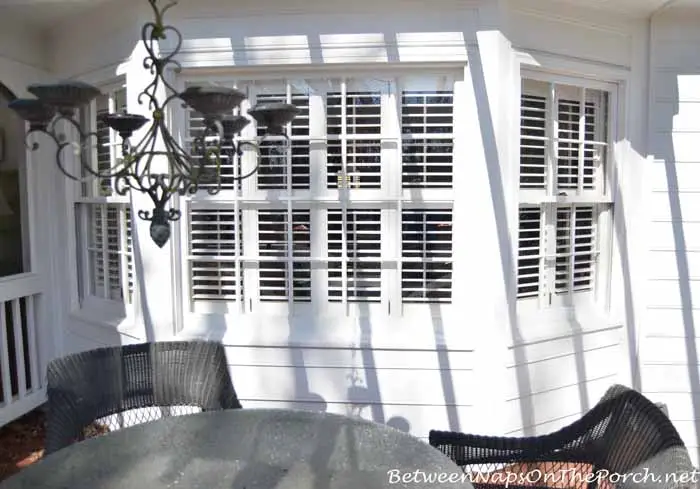
En y regardant de plus près, j'ai pu voir que le vitrage s'était fissuré au niveau de la fenêtre. J'ai toujours toutes mes fenêtres d'origine et je ne veux jamais les remplacer si je peux l'éviter. J'aime vraiment l'aspect d'une vraie fenêtre à deux battants, alors quand j'ai fait peindre la maison, les peintres ont refait le vitrage des fenêtres qui avaient besoin d'un nouveau vitrage.
Je suis presque sûr de savoir pourquoi le vitrage de cette fenêtre n'a pas duré. En l'observant de près, il est évident qu'elle n'a jamais été apprêtée ni peinte après la réparation du vitrage. Le reste de la fenêtre a été peint, mais le peintre a en quelque sorte oublié la partie supérieure de la fenêtre.
J'ai fait quelques recherches sur le vitrage des fenêtres et j'ai décidé que c'était un bricolage que je pouvais gérer moi-même. Je me suis rendu chez True Value et j'ai acheté plusieurs outils en prévision de la réparation du vitrage de la fenêtre.
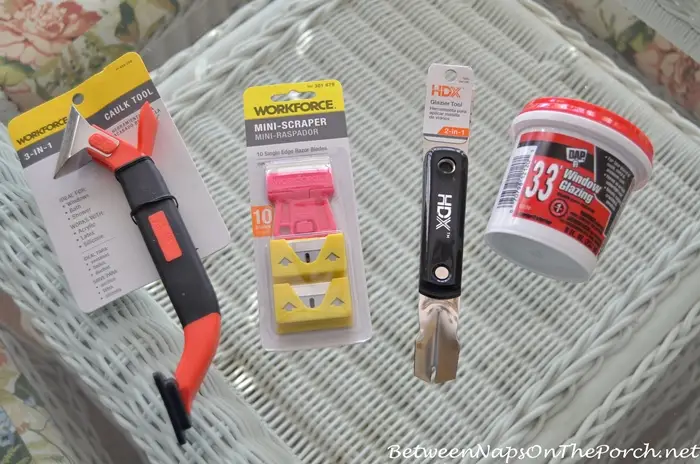
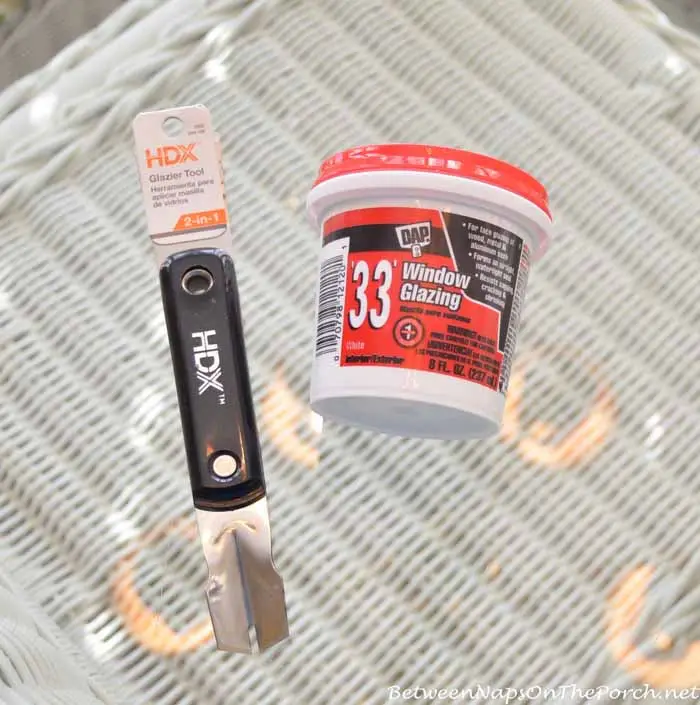
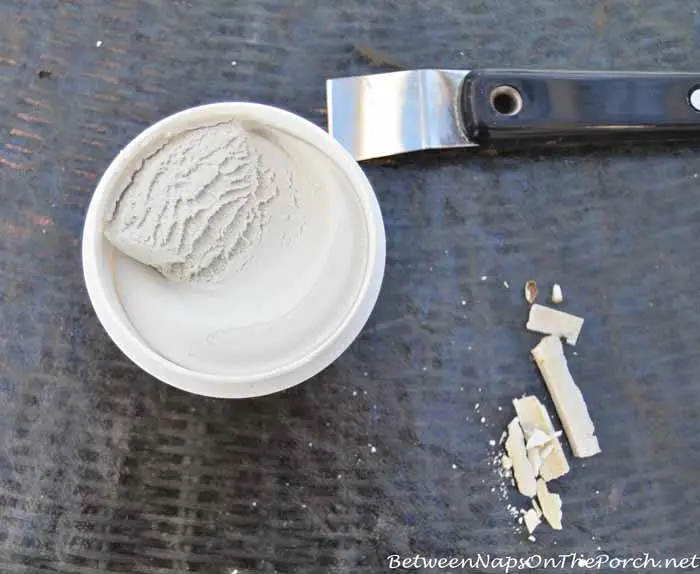
En fin de compte, ce sont les deux seuls outils dont j'avais besoin : l'outil de vitrier et le composé de vitrage pour fenêtre.
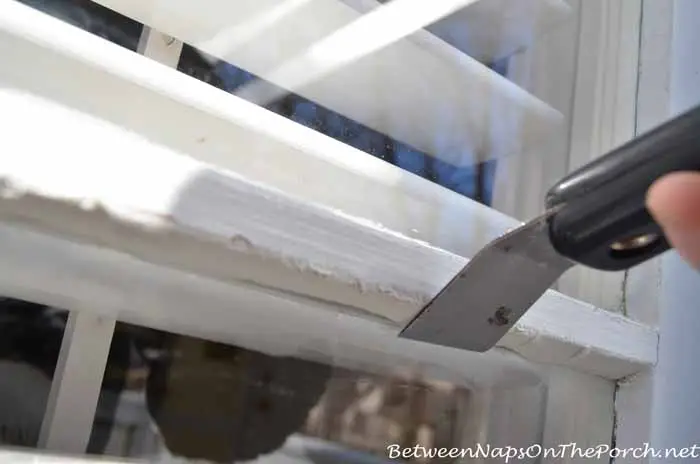
Lorsque vous vitrez une fenêtre, l'une des premières choses que vous devez faire est de retirer tout ancien vitrage ébréché ou endommagé. Si leLe vitrage est toujours en place et semble bon pour une partie de la fenêtre, il peut rester, mais il est préférable de retirer complètement tout vitrage qui semble ébréché ou desserré, car cela peut empêcher le nouveau vitrage d'adhérer comme il le devrait.
À l’aide de l’extrémité inclinée de l’outil de vitrier, j’ai gratté le reste de l’ancien vitrage qui courait le long du haut de la fenêtre. Il est important de travailler lentement et soigneusement lors du retrait de l’ancien vitrage pour éviter de casser le verre. Alors n’appliquez pas trop de pression, cela n’en vaut tout simplement pas la peine.
Une fois tous les vieux vitrages retirés, j’ai essuyé la zone avec un chiffon. Vous pouvez également utiliser une brosse dure pour ce faire. Encore une fois, cela garantit simplement qu'il ne reste aucun petit éclat qui pourrait interférer avec la façon dont le vitrage adhère à la fenêtre.
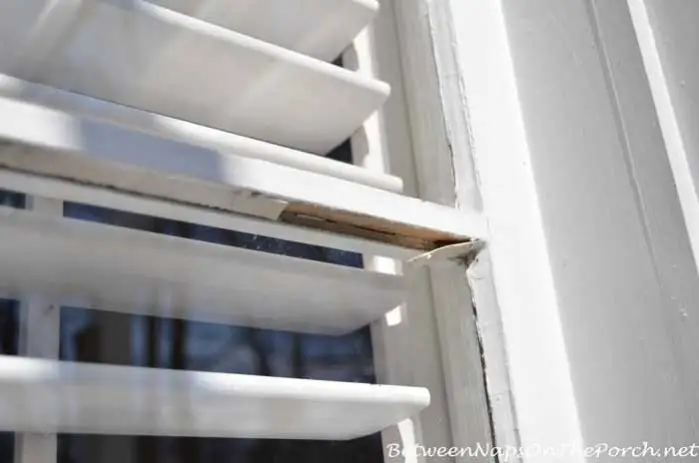
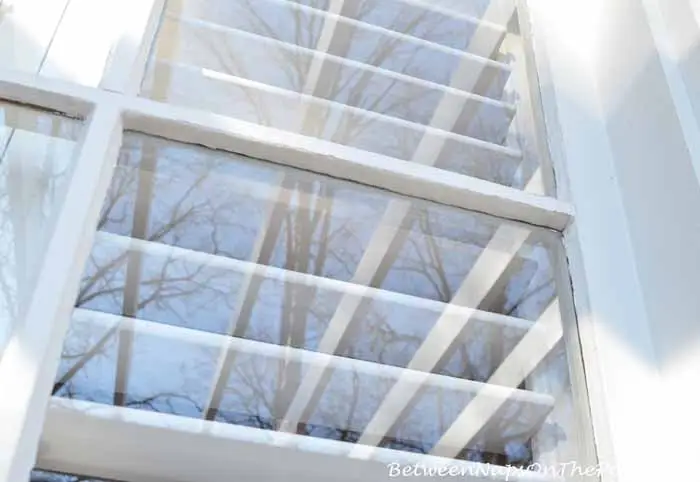
C'est le bon moment pour signaler quelque chose. auquel vous devrez faire attention lors de l’application du vitrage. Remarquez comment une partie du meneau de la fenêtre en bois de l'autre côté est visible sur l'image ci-dessous puisque le vitrage est manquant. Lors de la pose du nouveau vitrage, veillez à ne pas descendre en dessous du bas du meneau intérieur car si le vitrage descend trop bas, vous pourrez le voir de l'intérieur en regardant par la fenêtre. Le vitrage que vous appliquez à l’extérieur ne doit pas être visible à l’œil nu de l’intérieur.

Voici à quoi ressemble le vitrage à l’intérieur du conteneur. Le vitrage se présente également en tube, tout commecalfeutrage. J'ai décidé d'aller à la vieille école et d'utiliser le type dans le conteneur. Pour commencer, j'ai récupéré un bon morceau de pâte à vitrage avec l'outil de vitrier, de la taille d'une balle de ping-pong. Je l'ai roulé encore et encore dans mes mains, laissant la chaleur de mes mains le réchauffer. Vous pourriez probablement porter ces fins gants en latex pour cette partie si vous le souhaitez. Je n’ai pas eu et n’ai eu aucun problème avec le vitrage qui collait à mes mains. Une fois le vitrage adouci, je l'ai appliqué sur la fenêtre avec mon outil de vitrier.
Conseil : Il est préférable de vitrer une fenêtre lorsque la température extérieure est chaude et confortable. J’ai trouvé un peu difficile de travailler avec le vitrage car c’était dans les années 50 lorsque je faisais le vitrage et les fenêtres étaient froides. Je n’ai donc presque pas eu le temps de travailler sur le vitrage avant qu’il ne recommence à se rigidifier. Sachant ce que je sais maintenant, j'aurais probablement dû attendre jusqu'au printemps. Alors, gardez cela à l'esprit et cela rendra le travail un peu plus facile.
Une autre chose qui a rendu le processus un peu plus délicat était la zone dont j'avais besoin pour appliquer le vernis se trouvant en haut de la vitre. L’application d’un vitrage sur le côté ou en bas d’une fenêtre est un peu plus facile. Ce que j'ai trouvé qui fonctionnait le mieux, c'est qu'après avoir réchauffé le glaçage dans mes mains, j'ai déroulé une section de 4 à 5 pouces de long en forme de serpent, un peu comme nous le faisions avec de la pâte d'argile quand nous étions enfants. 🙂 Alors jepressa le serpent de vitrage contre la vitre de la fenêtre, là où se trouvait l'ancien vitrage. Ne vous inquiétez pas s'il semble y en avoir trop, car cela sera retiré lorsque vous lisserez le vitrage avec l'outil de vitrage.

Dans cette image précédente, remarquez comment le L'outil du vitrier est incliné.
Cela vous permet de presser et de lisser le vitrage, en vous assurant qu'il est incliné vers la fenêtre. Cela aidera l’eau de pluie à s’écouler de la fenêtre et le long de la vitre, et cela sera tout simplement plus joli. Ainsi, à l’aide de mon outil de vitrier, j’ai pressé le composé de vitrage en place le long de la fenêtre, en descendant par la fenêtre. Encore une fois, il est préférable de le faire lorsque la température extérieure est modérée et pas trop froide, car le composé de vitrage restera flexible pendant le processus.
Une fois que le composé de vitrage a été pressé à nouveau doucement, la fenêtre à un angle comme illustré ci-dessous, j'ai pris mon outil de vitrier et je l'ai passé le long du vitrage pour le lisser sur toute la longueur de la vitre. Si le bord du vitrage est un peu irrégulier par rapport à la vitre, le bord de l'outil de vitrier peut être utilisé pour le couper afin qu'il paraisse propre et bien rangé.
Depuis Je travaillais par temps froid, je n'ai pas eu le temps de lisser le composé de vitrage autant que je l'aurais souhaité avant qu'il ne commence à durcir, mais je pense que le résultat est plutôt bon étant donné que c'était mon premiertentative de vitrage. Alors vous savez ce que cela signifie : si je peux faire ça, vous le pouvez certainement ! Une fois que l'émail a eu suffisamment de temps pour sécher, je l'apprête et je le peins.
Le vitrage des fenêtres est comme n'importe quoi d'autre, plus vous le faites, plus cela deviendra facile. Alors ne soyez pas frustré si votre première tentative ne semble pas très soignée. Retirez simplement le vitrage pendant qu'il est encore mou, roulez-le dans vos mains pour le réchauffer à nouveau et appuyez-le à nouveau dans la fenêtre pour recommencer. Le composé avec lequel je travaillais était plutôt indulgent, malgré les températures froides. Ainsi, ce processus devrait être encore plus facile lorsqu'il est effectué par une belle journée avec des températures plus modérées.
Avez-vous déjà réparé ou remplacé un vieux vitrage dans une fenêtre ? Vous avez de bons conseils à partager ? J'adorerais les entendre !
J'étais l'un des blogueurs sélectionnés par True Value pour travailler sur la DIY Squad. J'ai été rémunéré pour le temps que j'ai consacré au programme et pour avoir écrit sur mon expérience. J'ai également été rémunéré pour le matériel nécessaire à mon projet de bricolage. Cependant, mes opinions sont entièrement les miennes et je n'ai pas été payé pour publier des commentaires positifs.
J'attends avec impatience tous les merveilleux avant et après pour ce Met Monday !

Si vous participez à Metamorphosis Monday, vous devrez lier le « lien permanent » à votre article MM et non à l'adresse générale de votre blog. Pour obtenir votrelien permanent, cliquez sur le nom de votre article, puis copiez et collez simplement l'adresse qui apparaît dans la barre d'adresse en haut de votre blog, dans la case « url » pour InLinkz.
Pour créer un lien, vous devrez inclure un lien dans votre message MM vers la fête afin que les autres participants aient la possibilité de recevoir la visite de vos merveilleux lecteurs de blog.
Veuillez respecter ces quelques règles :
Liez uniquement les publications Avant et Après qui concernent la maison, le jardinage, l'artisanat, la peinture, la couture, la cuisine ou le bricolage.
Ne créez pas de liens si vous le faites pour promouvoir un site Web ou un produit.
Ne créez pas de lien vers une publication qui vient d'être liée la semaine dernière, car de nombreux lecteurs auront déjà vu cette publication.
Veuillez ne pas créer de lien plus de 2 ou 3 "Avant/ Après »poste chaque semaine. Merci !