Comment dessiner un chiot : instructions étape par étape approuvées par le vétérinaire
Si vous adorez les chiots et aimez aussi dessiner des chiots, nous avons quelque chose en commun. Divulgation complète : je suis vétérinaire, pas artiste, mais j'adore dessiner, et ma familiarité avec l'anatomie et le mouvement canins est utile lorsque je veux que mes œuvres ressemblent au moins un peu à la réalité !
Donc, si vous recherchez une masterclass en dessin, ce guide n’est peut-être pas tout à fait ce que vous recherchez. Mais si vous souhaitez apprendre quelques techniques de base pour transformer vos œuvres d'art de chiot dignes d'être dignes de grincer des dents en dignes d'un réfrigérateur, vous êtes au bon endroit !

Avant de commencer
Tout d'abord : vous devez vous assurer que vous avez tout pour créer votre chef-d'œuvre, ainsi que de nombreuses erreurs en cours de route ! Voici une liste de choses dont vous aurez besoin :
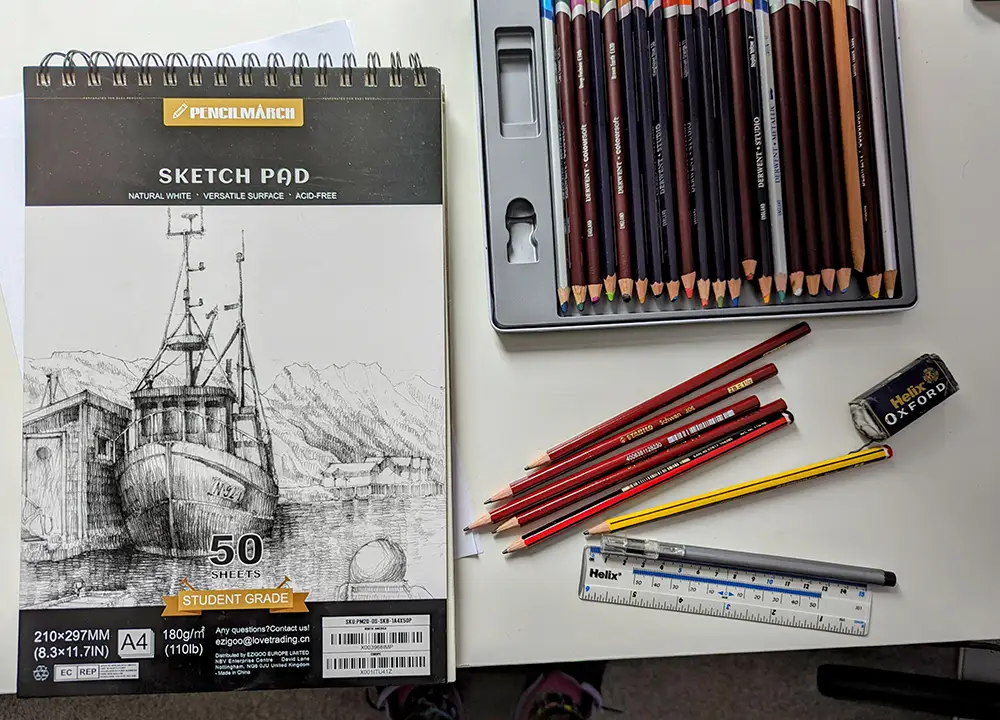
Papier
N'importe quel format, type ou couleur fera l'affaire, mais les impressions rejetées sont idéales pour les premiers croquis. . À mesure que vous gagnez en confiance, investir dans des carnets de croquis décents avec du papier de bonne qualité peut faire toute la différence. Personnellement, je préfère ceux qui sont reliés en haut plutôt que sur le côté, comme celui-ci, mais c'est entièrement à vous de décider.
Crayons et amp; Taille-crayon
Le dessin nécessite souvent des crayons de différentes duretés, et je suggérerais d'en avoir au moins quelques-uns 2H, 2B et 4B. Vous ne voulez pas être frustré par un instrument contondant, alors assurez-vous également d'avoir un taille-crayon.
Gomme
Une bonne qualitéla gomme signifie moins de bavures.
Règle
Vous pensez peut-être que les chiots n'ont pas beaucoup de lignes droites, et vous avez raison, mais vous en aurez besoin pour marquant nos proportions. Un petit suffit.
Couleurs
Pour commencer, nous travaillerons principalement dans les tons de gris, mais il n'est jamais trop tôt pour investir dans un bon ensemble de crayons de couleur. Vous pouvez vous procurer un jeu de crayons de couleur de base ou utiliser cette trousse de 120 crayons aquarelle, parfaits pour ombrer la fourrure.
Stylo à traits fins
Pour revoir votre dessin une fois que vous êtes satisfait. Un ensemble de différentes tailles est idéal pour dessiner.
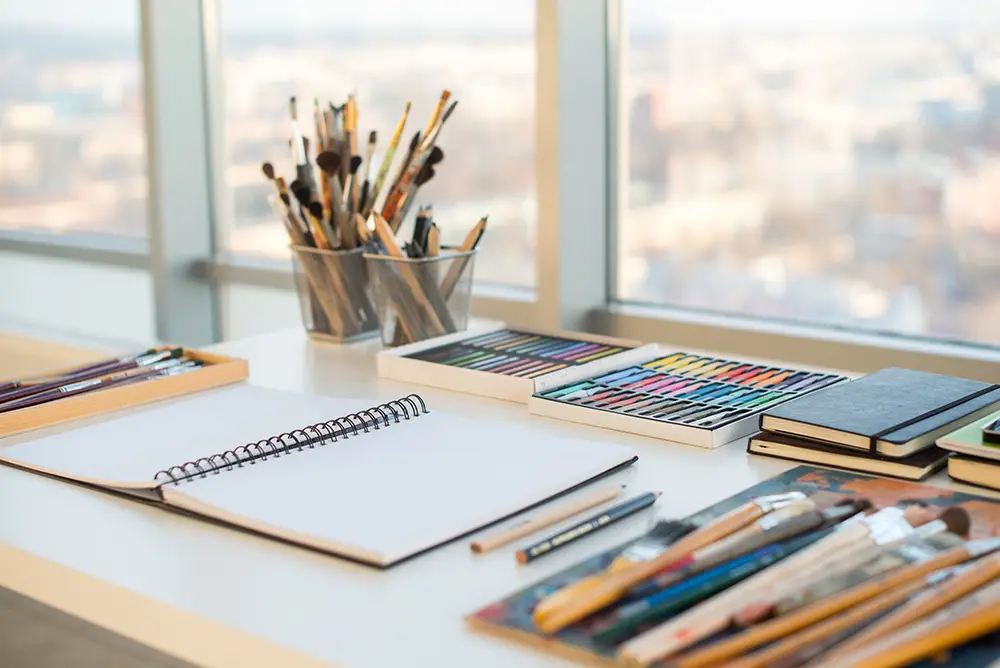
Inspiration
Entourez-vous de vos images, figurines ou photos de chiots préférées qui vous inspirent. Le problème avec le dessin d'un sujet vivant et respirant est qu'il a tendance à s'ennuyer et à s'égarer pendant que vous essayez de le dessiner, donc si vous avez en tête un chiot particulier que vous aimeriez immortaliser sous forme imprimée, prenez de nombreuses photos d'eux dans différentes positions, avec des gros plans de leur visage.
 Crédit image : Undrey, Shutterstock
Installez-vous confortablement
Vous n'avez pas besoin d'un studio, juste d'un une surface plane où vous pouvez étaler vos fournitures, un bon éclairage et une chaise confortable. Si vous avez d'adorables inspirations réelles, sachez qu'ils ne poseront peut-être pas pour vous, mais qu'ils essaieront absolument d'interférer avec votre dessin.et essaie de manger tes crayons !

Une brève leçon d'anatomie
Comme je l'ai déjà mentionné, je suis vétérinaire, pas artiste, donc mes points forts résident dans la compréhension de l'anatomie et de la fonction, mais cela peut être d'une grande aide lorsqu'il s'agit d'obtenir les proportions et les angles corrects sur votre image. Que vous souhaitiez créer un portrait réaliste ou un dessin animé mignon, avoir une idée de comment et où les articulations et autres caractéristiques doivent se trouver peut faire toute la différence entre un gribouillage enfantin et un superbe dessin.
L'image suivante est un croquis très basique pour vous donner une idée de la façon dont l'anatomie et les articulations des membres d'un chiot correspondent aux nôtres. Cela peut vous aider à avoir une idée de la direction du mouvement dont chaque articulation sera capable. Il n’y a rien de pire qu’un genou qui se plie dans la mauvaise direction !
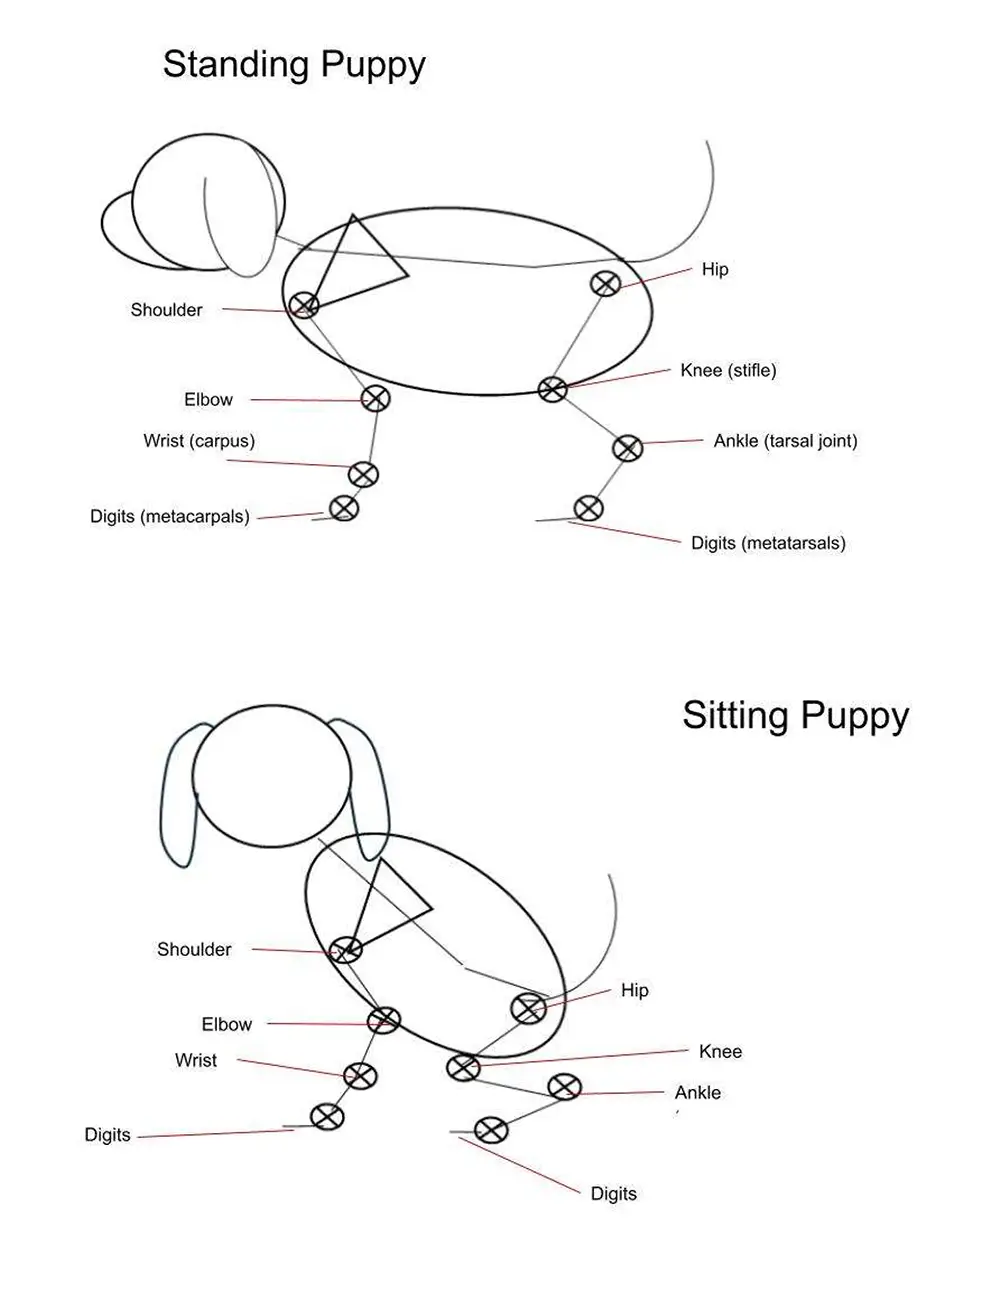 Vous êtes libre d’utiliser cette image, mais nous vous demandons de créer un lien vers Dogster.com pour obtenir le crédit.
Vous pouvez télécharger les PDF de ces modèles ici pour les utiliser comme guide jusqu’à ce que vous vous sentiez plus à l’aise avec les proportions, en gardant à l’esprit que les proportions des chiots ont tendance à être un peu différentes de celles d’un adulte, et que tout a tendance à être un peu plus rond !
Évidemment, avec autant de races différentes avec des formes et des tailles très différentes, il est impossible de vous montrer comment les dessiner toutes, mais une fois que vous avez pris le coup de main, les bases sont faciles à modifier pour s’adapter à votre préférée !
Comment dessiner des visages de chien
Comme les images ci-dessus, ces croquis peuvent vous aider à positionner les yeux, les oreilles, le nez et la bouche de votre chiot. L’une des erreurs les plus courantes consiste à positionner les yeux trop haut, afin que vous puissiez voir à quel point ils doivent être placés bas. N'oubliez pas que même si chaque chiot est parfait, rien dans la nature n'est parfaitement symétrique, et ces croquis sont simplement destinés à vous aider à définir correctement vos proportions et vos emplacements dès vos débuts.

I J'utilise deux formes de visage génériques, l'une avec un museau plus long et des oreilles tombantes, et l'autre avec un museau plus court et des oreilles droites, mais encore une fois, il ne s'agit que d'un guide de base à partir duquel travailler.
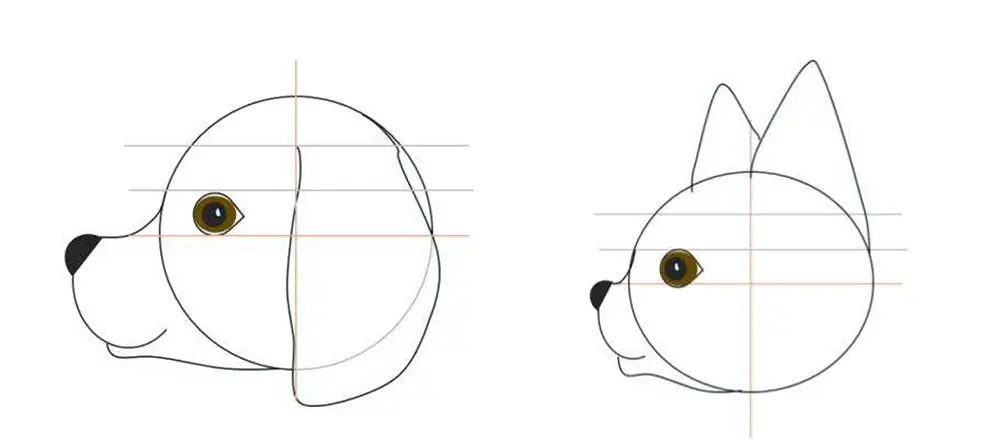
La vue latérale varie beaucoup en fonction de la race, alors faites très attention à la forme du museau, à la taille et à l'angle du chiot que vous souhaitez dessiner.
Donc, Nous disposons maintenant de quelques modèles de base pour nous guider à travers l'anatomie d'un chiot. Passons aux choses amusantes et utilisons ces modèles ! Vous trouverez ci-dessous quelques étapes de base à suivre pour dessiner un chiot debout et assis, et vous pouvez suivre la vidéo ici.
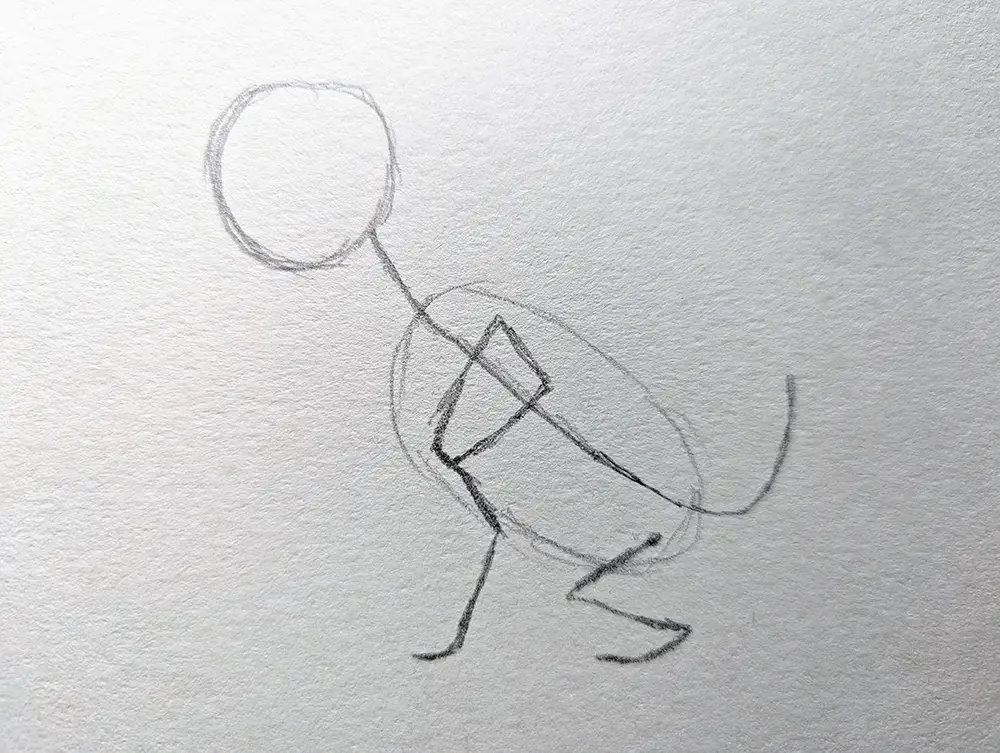
Comment dessiner un chien debout
1. Les bases – Lignes et amp; Formes
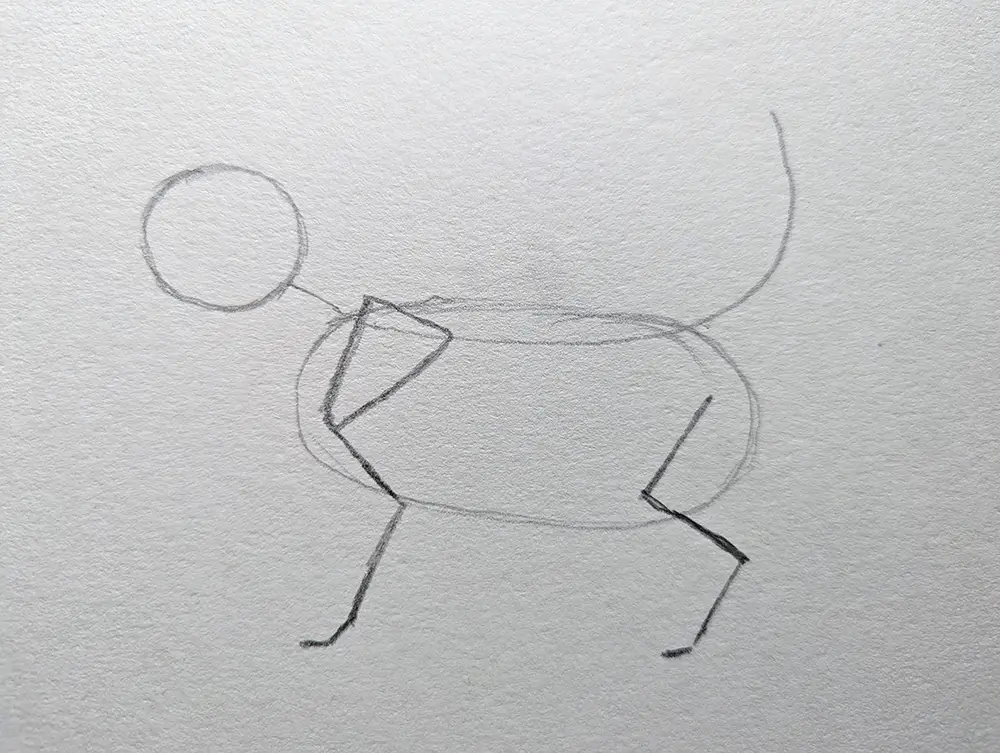
Utilisez le modèle pour obtenir votre contour et votre forme de base. L'omoplate est une caractéristique importante pour l'étape suivante, elle doit donc reposer légèrement sur la forme du corps. La patte arrière doit commencer en dessous de la ligne ducolonne vertébrale.
Et ne vous inquiétez pas : nous travaillons au crayon, nous pouvons donc faire des ajustements au fur et à mesure, alors ne vous inquiétez pas trop si votre chien ressemble un peu à une pomme de terre comme le mien !
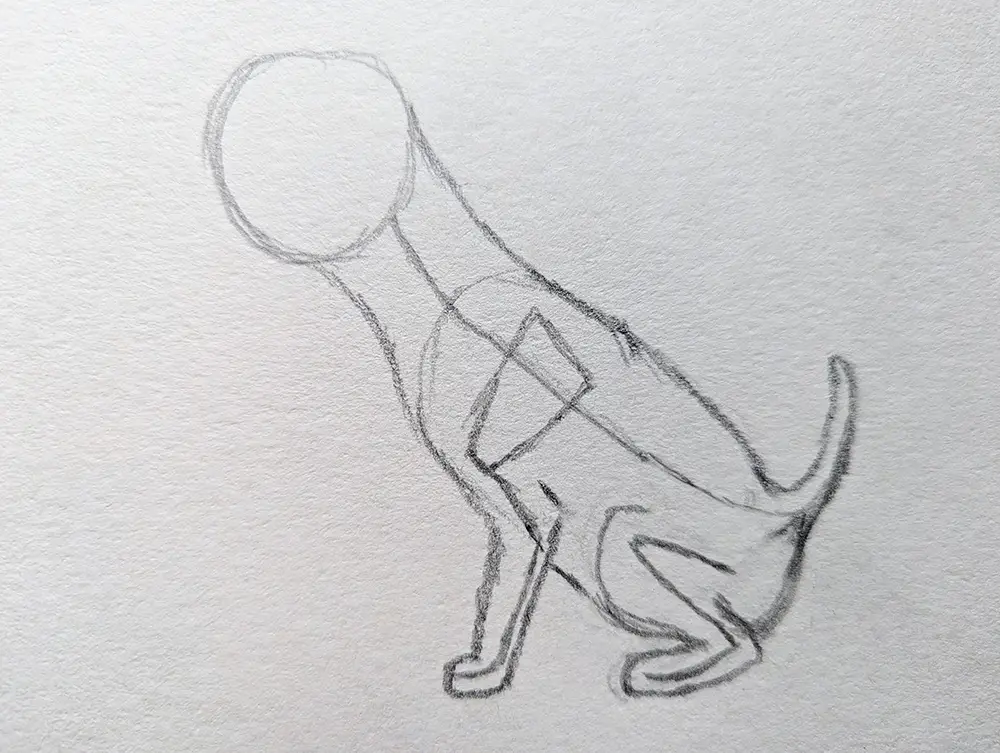
2. Création du contour

La clé est d'utiliser des traits de crayon doux et courts plutôt qu'une ligne continue. Il est beaucoup plus facile d’obtenir votre forme en procédant ainsi et cela donne au contour un aspect plus naturel. Remarquez comment l'omoplate est présentée dans le contour. Lorsque nous dessinons un chiot, nous voulons que tout soit un peu plus arrondi que si nous dessinions un adulte.
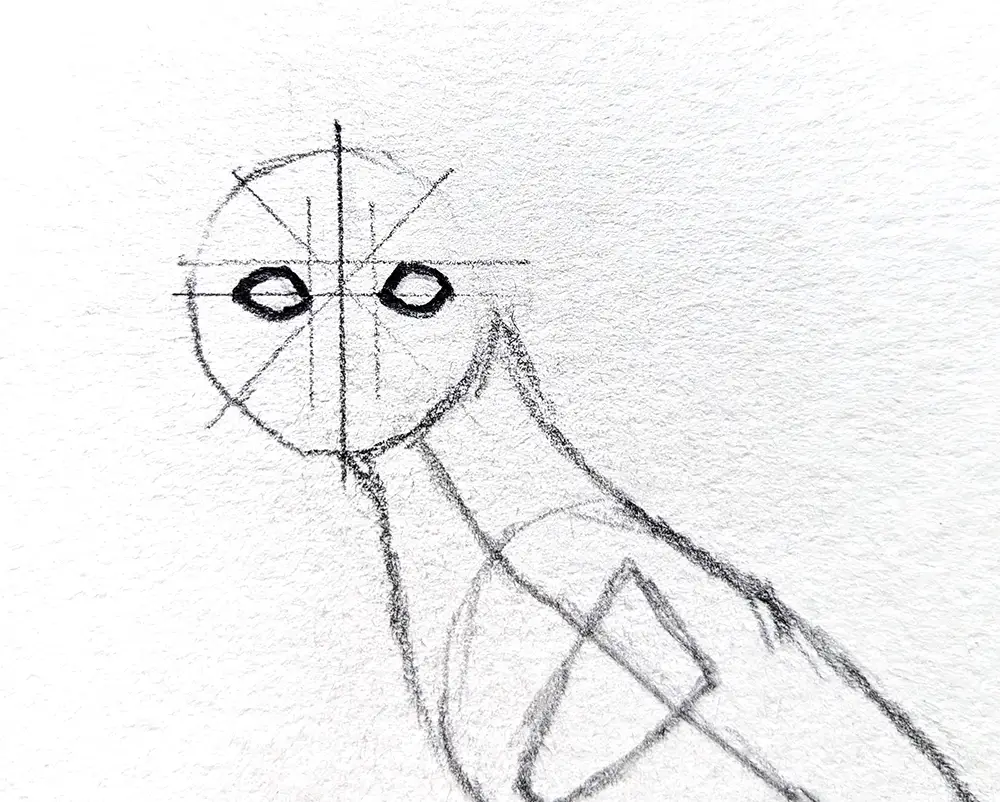
3. Ajout de détails
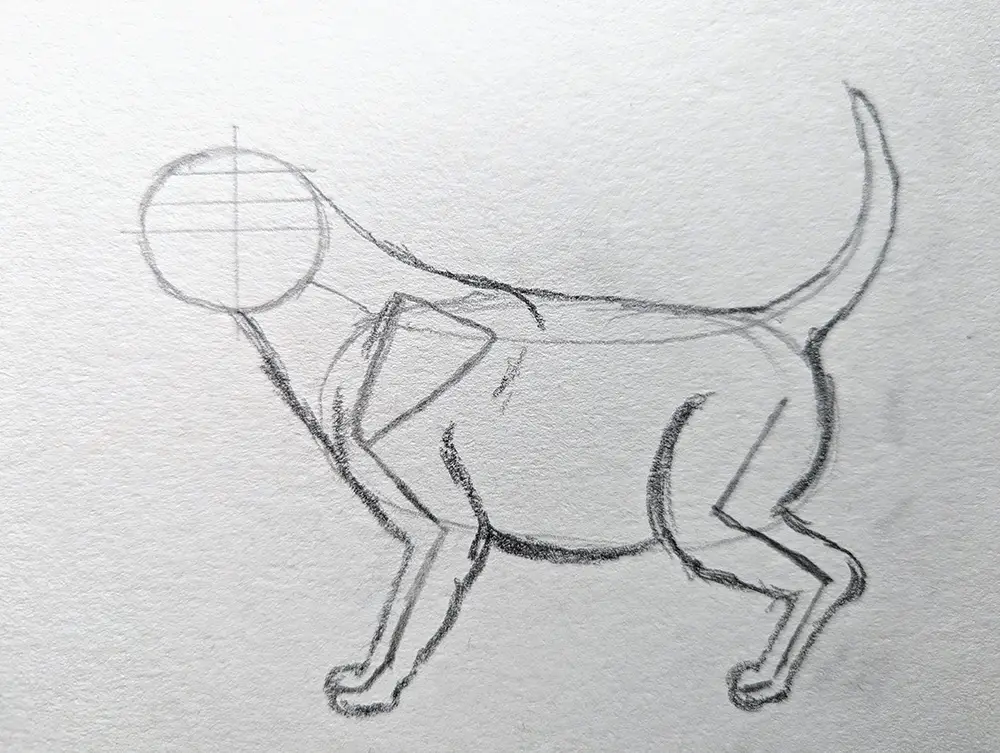
Une fois que vous êtes satisfait de votre contour, vous pouvez utiliser votre crayon 2B pour faire ressortir davantage votre contour. Continuez à utiliser des traits courts pour que votre chiot ait l'air doux.
Utilisez votre règle pour diviser la tête de votre chiot en quatre, puis divisez la moitié supérieure en tiers. Il n'est pas nécessaire que cela soit précis, car cela va simplement nous aider à placer les traits de notre visage.
Nous allons faire la tête latérale pour ce dessin.
4. Dessinez un visage de chiot heureux !
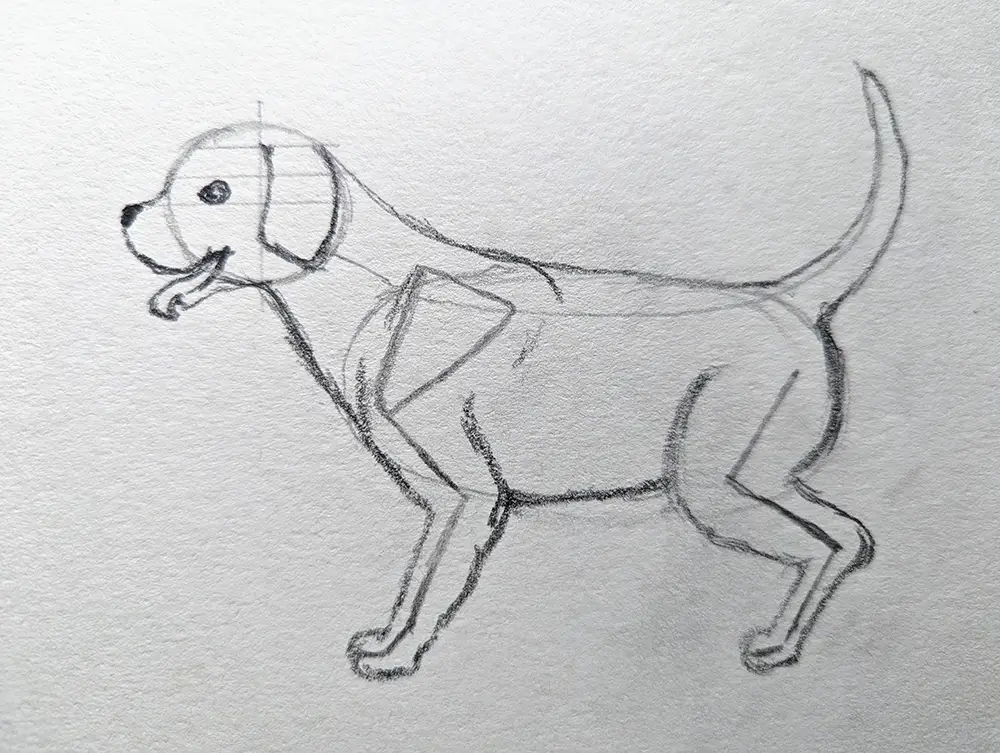
Commencez par dessiner l'œil sur la ligne horizontale médiane, approximativement à mi-chemin entre le centre et l'extérieur du cercle.
Notre oreille tombante commence là où la ligne médiane rencontre la ligne horizontale supérieure et revient jusqu'à cette ligne supérieure, mais la taille et la forme de votre oreille varient en fonction de la race que vous souhaitez dessiner.
Le haut dele museau commence à la ligne horizontale au-dessus de la ligne médiane, en pente le long de la ligne médiane. J'ai opté pour une bouche ouverte ludique, mais vous pouvez aussi le faire avec une bouche fermée.
5. Touches finales
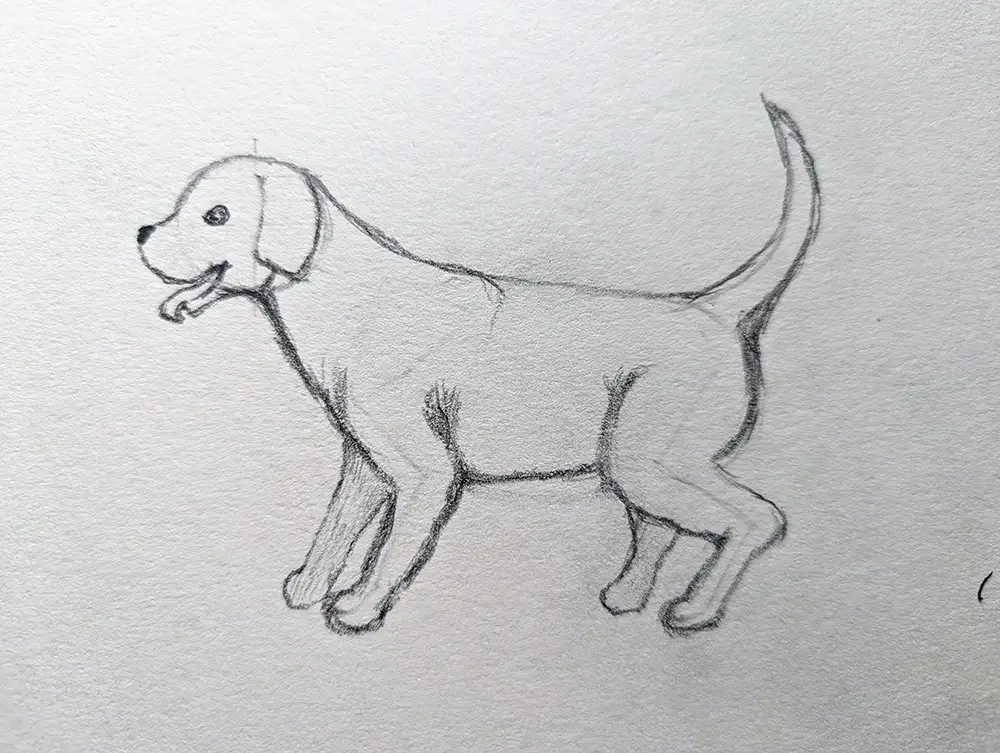
Ajoutez les deux autres pattes en les tirant légèrement devant et légèrement plus courtes, puis ombrez-les légèrement. Cela nous donne davantage une apparence 3D. Vous pouvez ajouter un peu de couleur si vous le souhaitez, mais je viens de laisser le mien sous forme de dessin au crayon.
Vous pouvez effacer certaines de vos lignes directrices maintenant, et votre crayon 4B est idéal pour ajouter de l'ombre à l'endroit où les jambes se rejoignent. le corps.
Vous n'aurez pas besoin d'utiliser les directives pendant longtemps ; jusqu'à ce que vous sachiez comment positionner vos membres et vos articulations et obtenir les bonnes proportions.
Et maintenant, nous allons nous attaquer à notre chiot assis, et je pense que vous allez adorer le résultat final ! Nos étapes sont fondamentalement les mêmes, mais il s’agit avant tout de bien nous positionner. Cette fois, nous allons faire quelques oreilles dressées sur un chiot orienté vers l'avant.
Comment dessiner un chien assis
1. Les bases – Lignes et amp; Formes
Comme ci-dessus, commencez par dessiner les lignes et les formes de base de votre chiot.
2. Création du contour
N'oubliez pas du modèle que la face avant est un peu plus complexe, alors commencez par diviser légèrement le cercle (tête) en huit sections égales.
3. Ajout de détails
Suivez lesmodèle de dessin pour positionner correctement vos yeux, et à partir de là, vous pouvez aligner votre nez. Ne vous inquiétez pas si votre chiot ressemble soudainement à Spiderman !
Nez
Pour dessiner le nez de votre chiot, commencez par un dessin latéral 3. Rendez-le plus épais et plus rond, et utilisez des ombres pour créer un nez plus réaliste.
Yeux
Les yeux peuvent sembler un peu délicats, mais ces étapes simples vous permettront vos yeux de chiot font fondre votre cœur dès la page.
Commencez par un cercle et entourez-le d'une forme en amande. Pour la pupille, dessinez un cercle plus petit et laissez une section blanche pour donner un peu d'éclat à l'œil. Ombrez l'iris et ombrez très légèrement les blancs dans les coins, car on voit rarement le blanc brillant des yeux.
4. Dessine un visage de chiot heureux !

Utilise les lignes pour placer des oreilles adorables, un nez boopable et une bouche souriante. J'ai décidé d'en faire un petit terrier débraillé, ce qui est plus facile que vous ne le pensez. Utilisez des traits courts en suivant l'anatomie du visage, en utilisant la direction de la fourrure pour aider à créer la forme du visage. N'oubliez pas d'ajouter un coussin d'oreille !
5. Touches finales
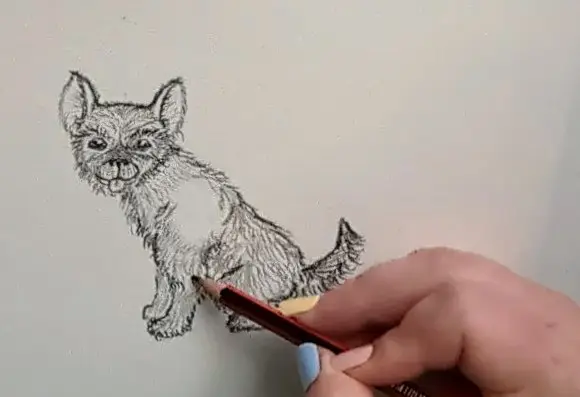
Continuez à utiliser des mouvements courts sur le contour du corps, des membres et de la queue, en veillant à ce que la direction de la fourrure suive la forme du corps. J'aime particulièrement les queues débraillées et bruissantes !
Le finiProduit

Le dessin peut être facile si vous le décomposez en étapes et en appliquant l'anatomie de base à la forme et au positionnement de votre chiot. Si j'ai pu le faire, vous le pouvez aussi !
Crédit image en vedette : Africa Studio, Shutterstock