Comment floquer un sapin de Noël étape par étape !
Et voici mes ornements, tous déballés et prêts à être accrochés (les ornements en argent et en or proviennent de Balsam Hill & HomeGoods, les boules vertes proviennent de Terrain) :

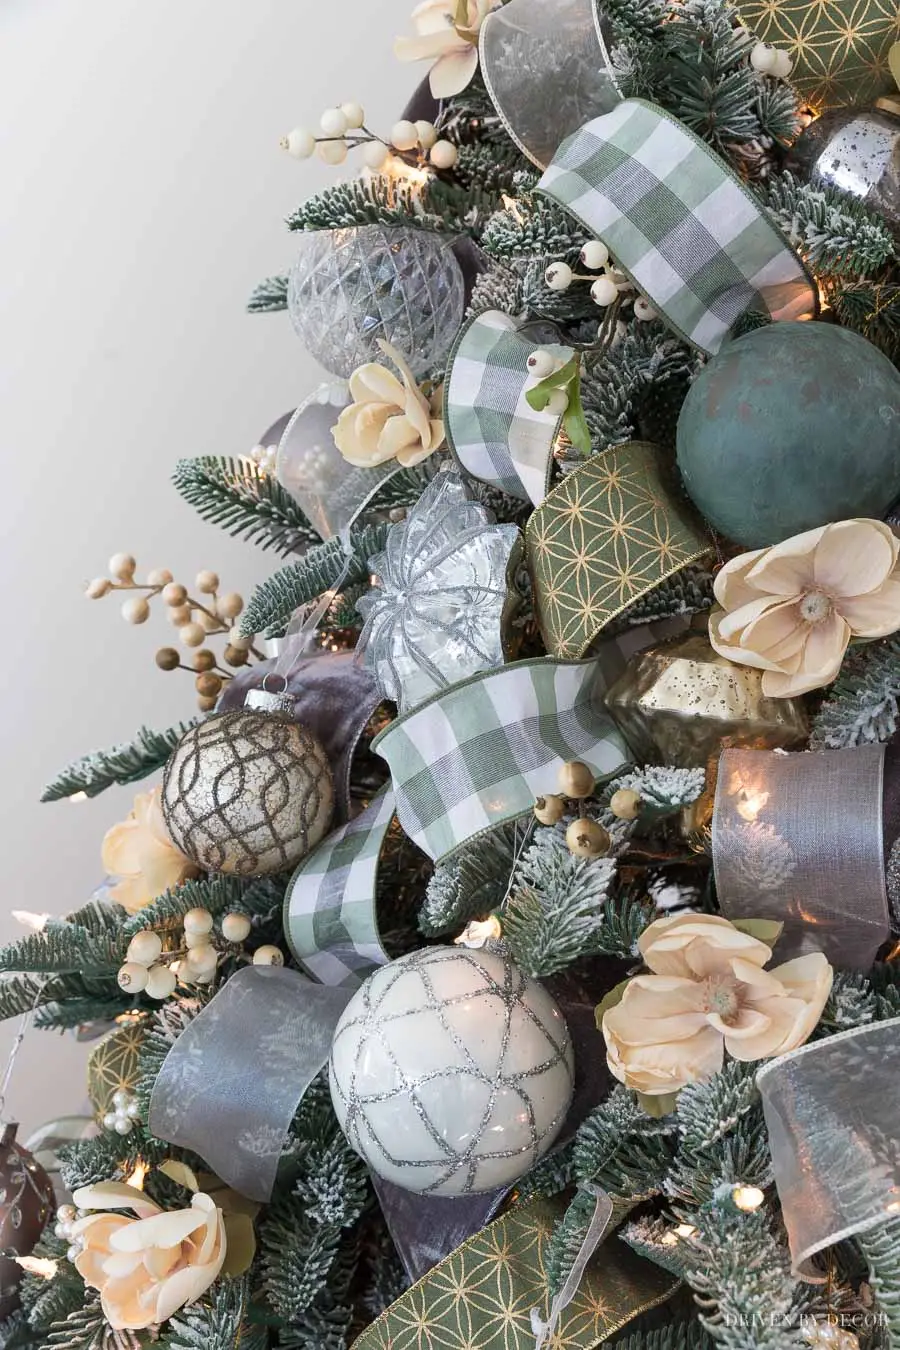
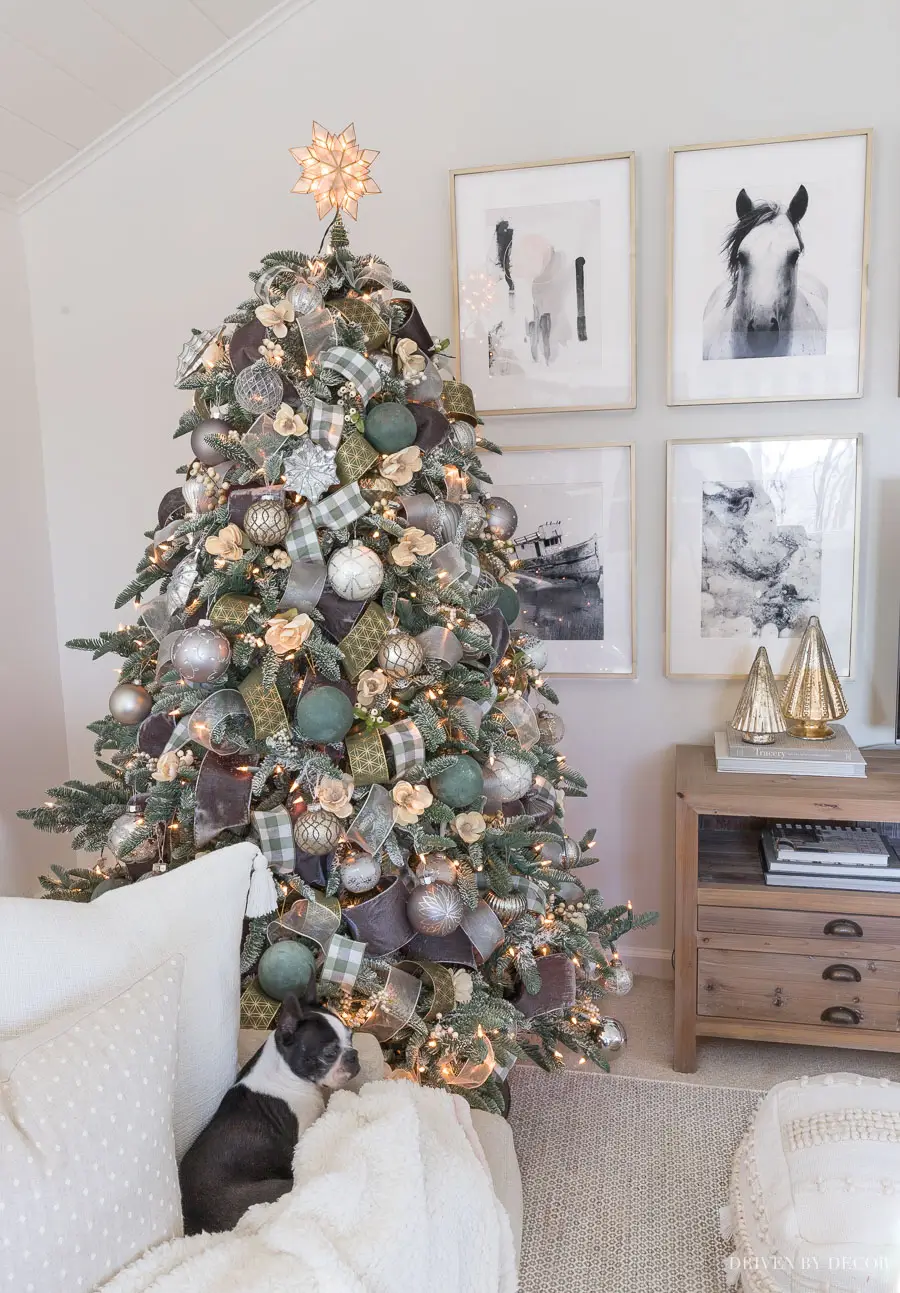
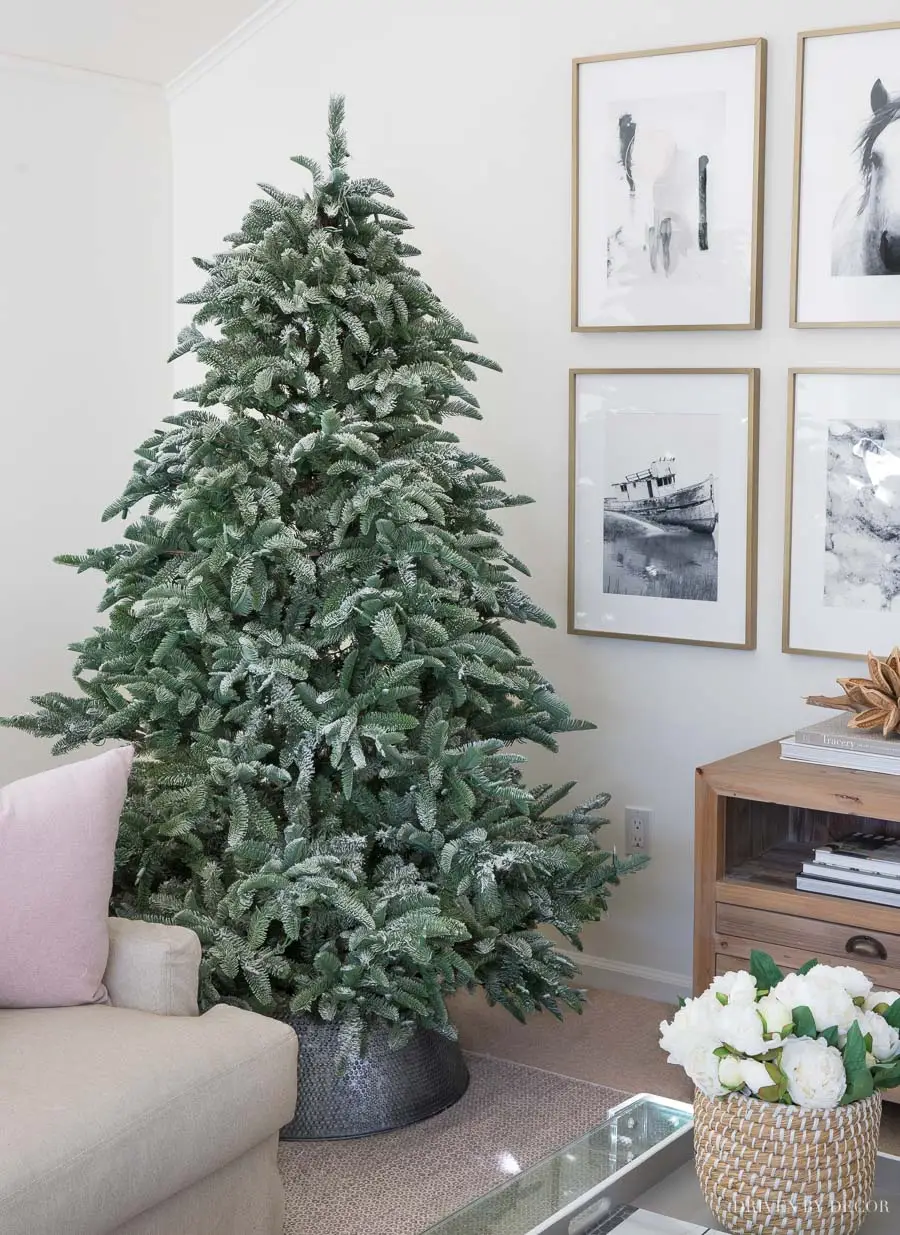
Je suis tellement content du résultat :
Je Je partagerai plus de photos une fois que j'aurai décoré le reste de notre salle familiale, mais ça a été tellement agréable de lever notre arbre tôt – nous en profitons tous (Cricket inclus 🙂) :
Sources : Oreiller à pampilles crème
J'adore le look des arbres de Noël floqués avec l'apparence d'une légère couche de neige et je pense depuis des années à acheter un nouvel arbre floqué pour notre salle familiale. Mais l’arbre que nous avons déjà est magnifique et a la taille parfaite pour notre chambre, donc cela ne semblait pas en valoir la peine. Puis j'ai réalisé que je pouvais obtenir cet aspect enneigé sans avoir à acheter un nouveau sapin en floquant le sapin de Noël que j'avais déjà, alors cette année, j'y suis allé ! C'était si simple – aujourd'hui, je partage étape par étape comment floquer un sapin de Noël au cas où vous voudriez l'essayer aussi ! (le message comprend des liens d'affiliation – déclaration complète disponible {ici})
Commençons par une étape par étape de ce qu'il faut faire, puis je répondrai à quelques questions courantes et montrerai vous mon arbre fini (j'ai tout décoré après avoir fini de le floquer !)...
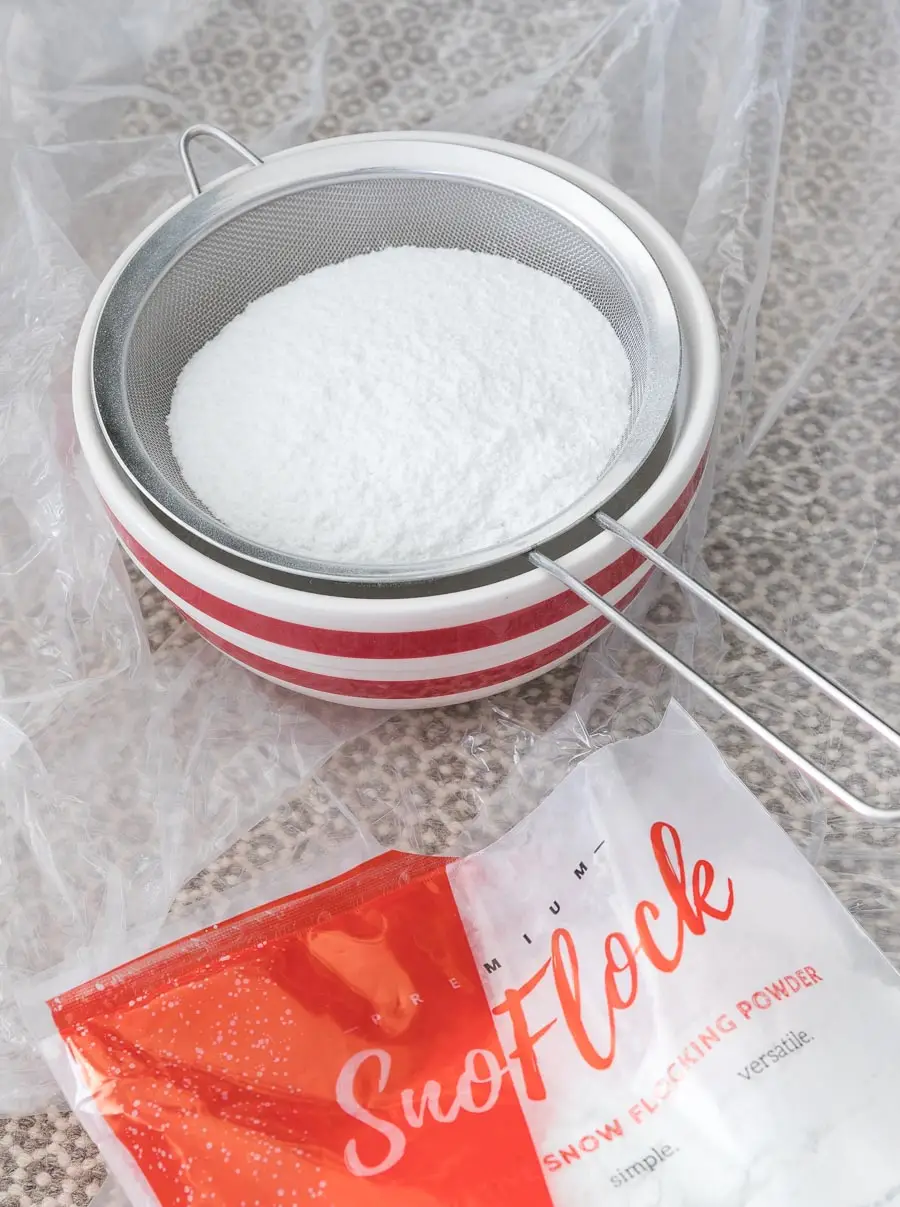
Étape 1 : Rassemblez vos fournitures
Les fournitures dont vous aurez besoin pour floquer votre Les arbres de Noël sont assez minimes : poudre de flocage (j'ai utilisé un sac de 2 livres de {cette poudre de flocage de neige}), passoires de cuisine à mailles fines (j'ai utilisé {cet ensemble de quatre passoires} ), un flacon pulvérisateur d'eau (vous pouvez vous procurer des flacons pulvérisateurs en verre avec des manchons en silicone similaires au mien {ici} mais n'importe quel flacon pulvérisateur fera l'affaire), et un bol pour reposer votre passoire. dans :

La poudre de flocage de neige se vend tôt chaque année, alors achetez-la bientôt si vous y réfléchissezà propos de l'essayer ! Si vous prévoyez d'assembler votre arbre à l'intérieur, vous aurez également besoin de fines toiles de protection en plastique (j'ai utilisé {ces}) et du ruban adhésif pour peintre pour protéger vos murs et votre sol. Prenez également un escabeau, un masque et un pichet d'eau pour recharger le flacon pulvérisateur.
Étape 2 : Assembler et amp; Fluff Your Tree
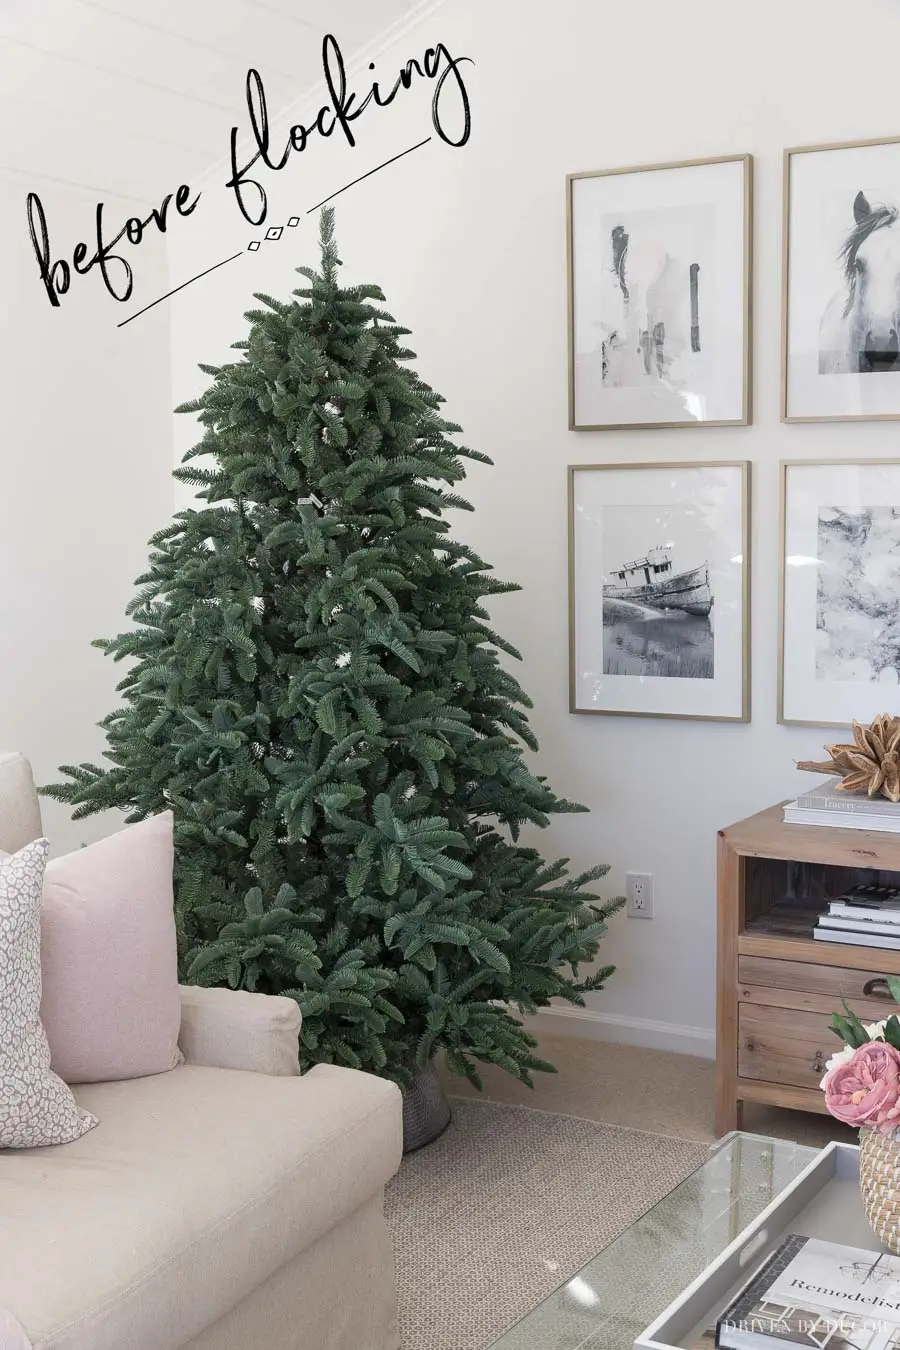
Le flocage peut être effectué aussi bien sur des arbres artificiels que sur des arbres frais. Si vous assemblez un faux arbre, assemblez-le et peluchez-le comme vous le devriez toujours avant de le décorer pour lui donner un aspect plus complet. Par pelucher, j'entends déployer les branches et les pointes individuelles afin qu'elles aillent dans plusieurs directions (elles ont tendance à être aplaties après le stockage). Voici à quoi ressemblait notre arbre une fois installé et gonflé : c'est un très joli arbre tel quel, alors je croisais les doigts pour l'adorer d'autant plus une fois que j'aurais terminé :
Étape 3 : Protégez vos murs et vos murs. Sol avec du plastique en cas de flocage à l'intérieur
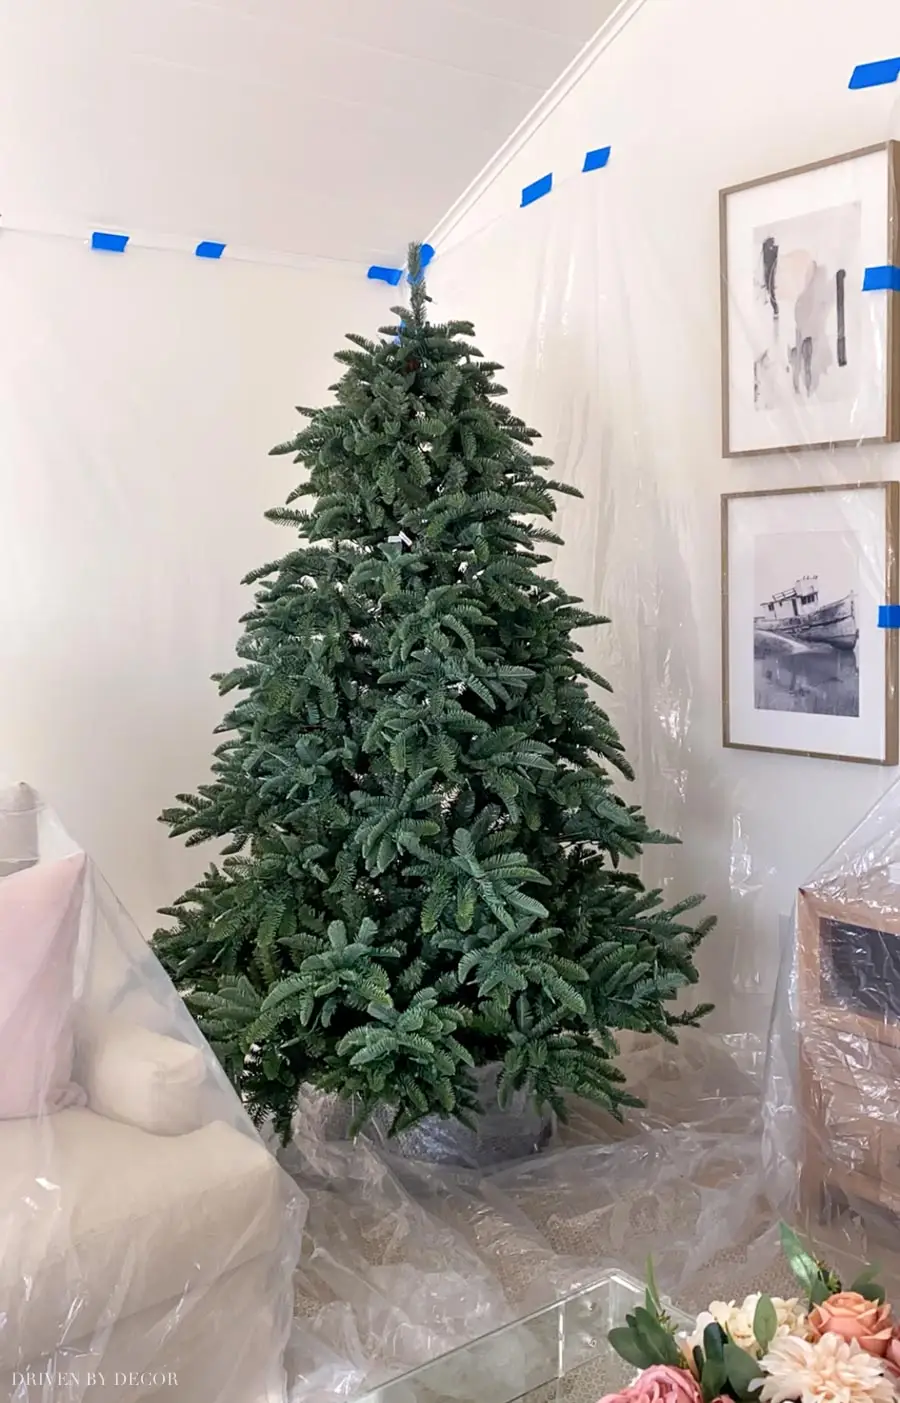
Il est en fait recommandé de rassembler votre arbre à l'extérieur, donc si vous suivez mon exemple sur celui-ci, vous le faites à vos propres risques 🙂 J'ai décidé de rassembler votre arbre à l'intérieur parce que c'était un problème. journée froide et venteuse où je voulais faire cela et j'ai pensé que le démonter à l'extérieur et le remonter dans notre salle familiale serait pénible. J'ai protégé les murs, les meubles environnants, le sol et le collier du sapin de Noël avec du plastique afin de pouvoir le mettre en place :
Étape 4 : remplissez une grande passoire avec de la poudre de flocage et du papier de verre. Vaporisez la première zone de votre arbre
Avec votre passoire au-dessus d'un bol pour récupérer toute poudre supplémentaire qui passe, remplissez-la à moitié avec de la poudre de flocage :
Ensuite, en commençant par le sommet de votre arbre, vaporisez les branches dans la zone où vous allez commencer le flocage (j'ai trouvé qu'il était préférable de flocer une grande section à la fois plutôt que l'arbre entier). Les branches doivent être humides mais pas dégoulinantes.
Étape 5 : Saupoudrer et arroser. Spray
Vous êtes prêts à affluer ! Avec votre passoire de poudre de flocage dans une main et votre bouteille d'eau dans l'autre, tamisez la poudre de flocage sur la zone que vous avez déjà pulvérisée et au fur et à mesure que le troupeau tombe, vaporisez-la sur l'arbre :
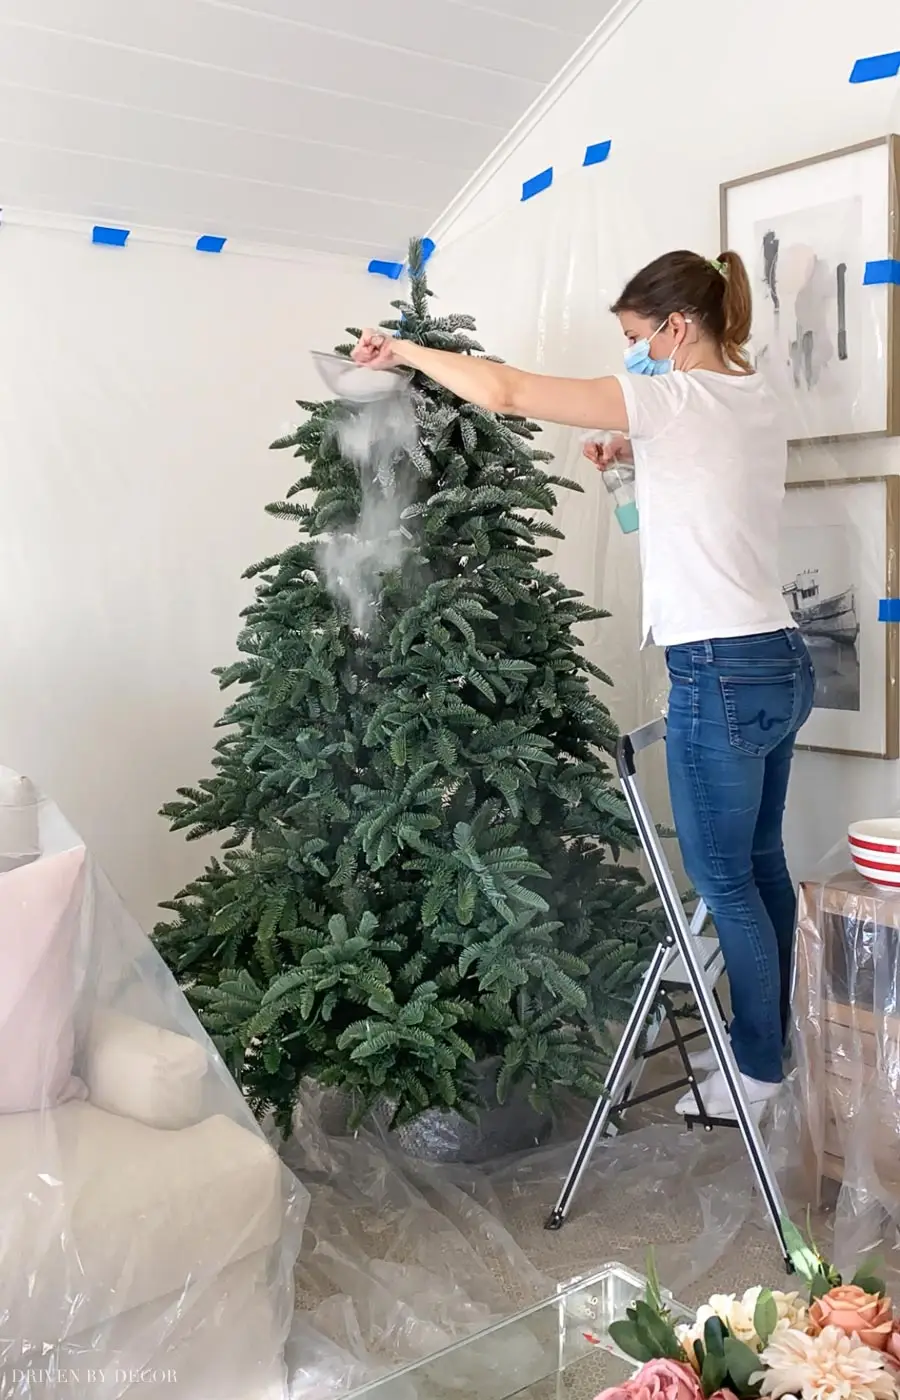
Assurez-vous de ne pas vaporiser la passoire elle-même, car la poudre de flocage s'agglutinerait et boucherait les trous de la passoire. Vous pouvez créer un flocage aussi léger ou aussi intense que vous le souhaitez – je voulais juste un flocage léger pour mon arbre.
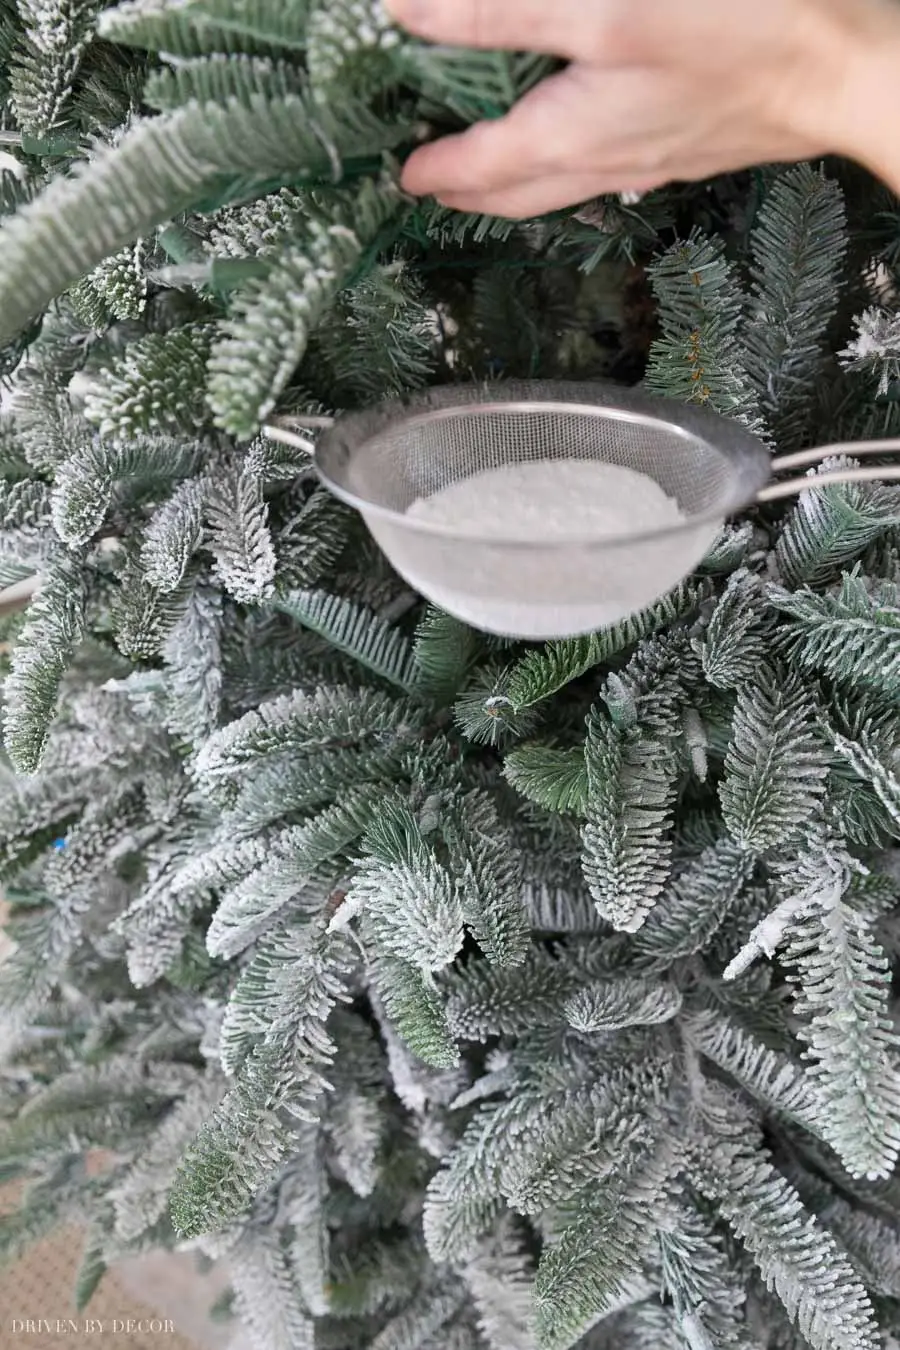
Vous n'avez pas besoin de rassembler chaque petite branche jusqu'à l'intérieur de l'arbre, car vous je ne les verrai vraiment pas (et la vraie neige ne parviendra généralement pas non plus au centre de l'arbre). Mais une fois que j'ai fini de flocage chaque zone, j'ai trouvé utile de mettre un peu de poudre de flocage dans une passoire plus petite pour couvrir certaines des zones qui étaient un peu plus difficiles à atteindre avec la grande passoire – parfoiscela inclurait de soulever certaines branches au-dessus pour me donner un meilleur accès :
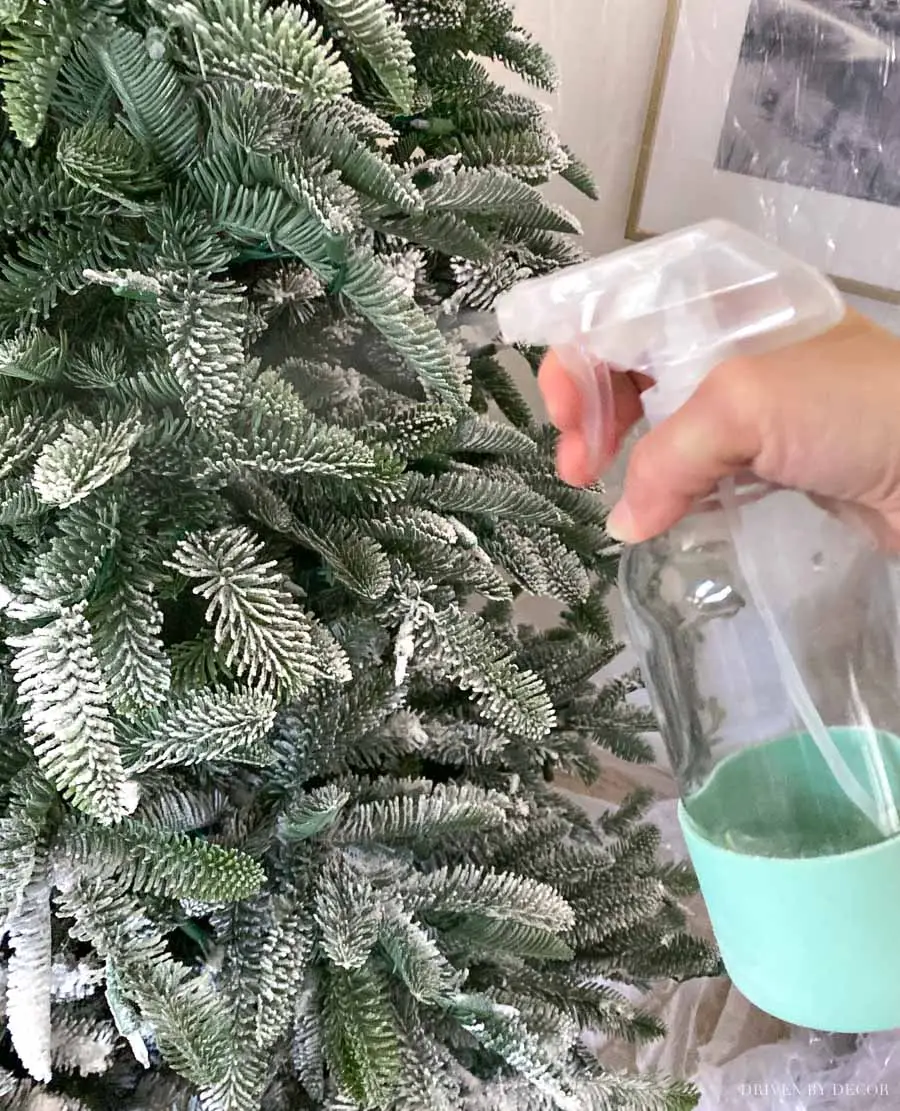
Étape 6 : Terminer avec une brumisation générale pour le sceller en place
Continuez avec les mêmes étapes jusqu'à ce que vous ayez floqué tout votre arbre. Le processus de flocage a été en fait assez rapide – il ne m’a fallu que 40 minutes environ pour l’éliminer. Une fois que vous avez terminé, vaporisez tout votre arbre avec de l’eau. Cela scellera et verrouillera votre poudre de flocage en place. Tout comme lorsque vous avez vaporisé votre arbre pour la première fois, vous voulez qu'il soit humide mais pas mouillé.
Étape 7 : Laissez-le sécher complètement
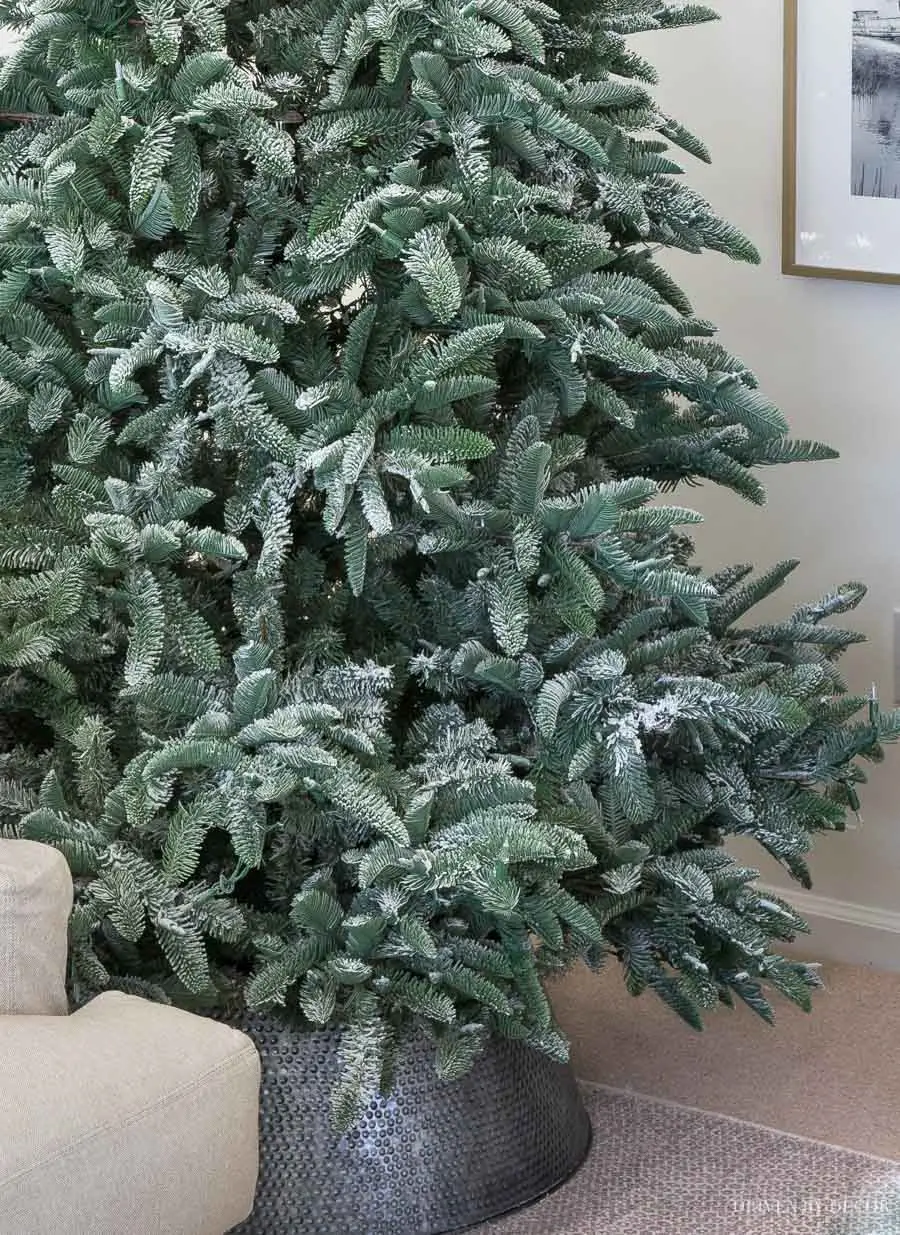
Maintenant, juste laissez sécher votre arbre nouvellement floqué avant de faire quoi que ce soit d'autre – j'ai floqué le mien dans l'après-midi et il était complètement sec lorsque je l'ai vérifié le lendemain matin. C’est à ce moment-là que j’ai soigneusement retiré tout le plastique environnant et que j’ai commencé à décorer ! Voici à quoi ressemblait mon arbre nu, nouvellement floqué – j'étais ravi car c'était exactement ce que j'avais en tête et il avait l'air très naturel :
Étape 8 : Décorez !
La dernière étape est la partie amusante : décorez votre arbre ! Si vous l'avez manqué, consultez {cet article} qui explique étape par étape comment je décore mes arbres de Noël, depuis mes colliers d'arbre préférés jusqu'à la façon dont j'ajoute mon ruban et plus encore. Cette année, j'ai décoré avec un mélange d'argent, d'or et de vert en utilisant mon ruban de velours gris 4'' que j'ai depuis des années (de Balsam Hill) plus {ce gris &J'avais des lumières qui n'étaient conçues que pour une utilisation en intérieur, donc j'affluais à mes propres risques :). Tout s'est bien passé avec le mien (je n'ai perdu aucune lumière), mais si vous choisissez d'assembler un arbre pré-éclairé avec des lumières qui ne sont pas adaptées à l'extérieur, sachez qu'il n'y a aucune garantie que cela ne leur nuira pas. Quelle que soit la valeur des lumières de votre arbre, débranchez définitivement vos lumières pendant le processus de flocage et ne les rebranchez pas tant que votre arbre n'est pas complètement sec.
Le flocage des lumières ne les rend-il pas plus sombres ?
Le flocage sur les ampoules les atténue un peu mais pas de manière perceptible pour moi. Mon arbre à l'étage que j'ai acheté pré-floqué a des bulbes floqués, donc je savais, grâce à cet arbre, ne pas trop m'en inquiéter. Vous pouvez certainement scotcher vos lumières avant de procéder au flocage si vous ne voulez pas que la poudre de flocage y adhère.
Le flocage d'un arbre est-il salissant ?
C'est un processus quelque peu compliqué, mais c'est aussi assez facile à nettoyer ! La poudre de flocage sèche s'aspire facilement, mais vous devez faire attention à suivre la poudre de flocage humide n'importe où dans votre maison car elle sèchera et durcira et sera ensuite difficile à enlever. Je vous recommanderais d'avoir un pichet d'eau à côté de vous pendant le flocage que vous pourrez utiliser pour remplir votre pulvérisateur d'eau afin de ne pas avoir à quitter la zone au milieu du flocage de votre arbre pour vous rendre à l'évier avec de la neige dessus. tonpieds. Portez des chaussettes pendant le flocage, puis enlevez-les lorsque vous retirez le plastique lorsque vous avez terminé. J'ai ensuite jeté mes chaussettes et mes vêtements au lavage et ils se sont parfaitement nettoyés.
Les arbres floqués perdent une partie de leur flocage (que vous fassiez le flocage ou que vous les achetiez floqués), surtout lorsque vous les installez et les prenez. les vers le bas mais il aspire facilement. Vous pouvez toujours ajouter plus de flocage à votre arbre si vous décidez que vous souhaitez qu'il soit plus fortement floqué ou si trop de flocage se détache après quelques années.
Le flocage est-il permanent ?
Oui, le le flocage durcit sur l'arbre comme la colle d'Elmer et est permanent. Vous ne pouvez pas l'enlever et avoir un arbre non floqué l'année suivante.
Si vous avez d'autres questions, n'hésitez pas à me le faire savoir !
